Our next door neighbors moved to an apartment downtown. They needed to get rid of a lot of stuff. They had carried through multiple moves a load of rough cut hickory boards acquired in the 80's. The boards were made from a hickory tree that was blown down in a tornado on my neighbor's grandfather's farm in Iowa. He offered me the boards. I accepted seeing the three boards he was holding. Turns out there were about a dozen more. The boards range in length from 3 to 6 feet. The width and thickness also vary significantly both between and within boards. Some have natural edges.
When discussing their impending move, I was shown a trapezoidal mirror that they had considered framing with this hickory. I volunteered to frame the mirror for them in return for the wood. They wanted a frame that was industrial in style. After looking up examples of "industrial style" I made a couple of sketches and sent them for feedback. They picked one of the examples. After a month or so I am finally getting around to tackling this project. I purchased some Super Blue from Birchwood Casey for bluing the L-shaped iron. I will probably use leftover stainless steel screws from the wedding backdrop to hold it together. This may change depending on how the stainless screws look against the blued steel.
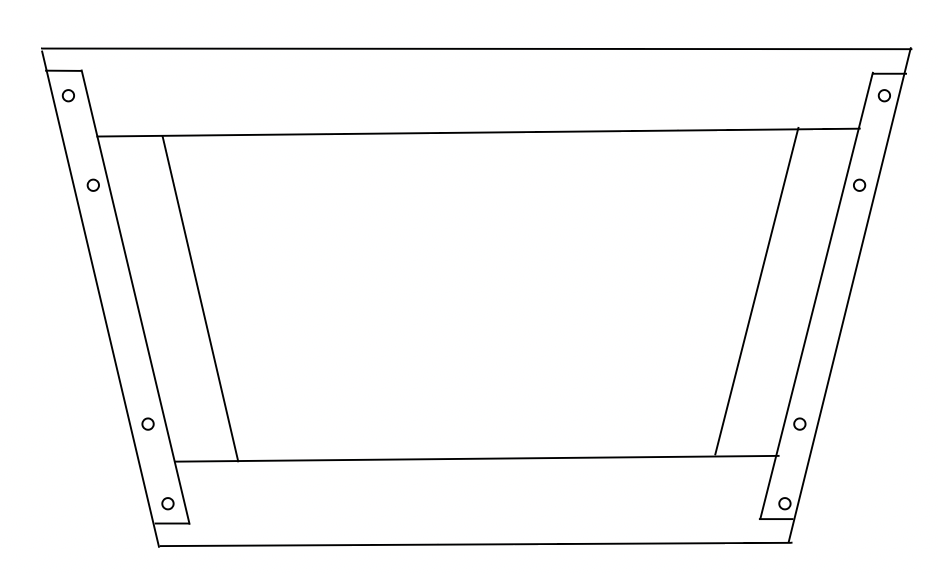
The first task was selecting the boards to use for the frame. After perusing them all I selected four boards. They had really pretty figuring and were sufficiently long to fit the design shown above. They were also of similar thickness 0.75±0.05". The plan was to use two boards long enough to extend the trapezoidal shape across the top and bottom. Shorter boards would fit between the top and bottom boards. Laying out the mirror and boards on the garage floor led me to establish a few critical dimensions. I decided on a frame that was 5" or so wide. Wide enough to see the beauty in these boards, but not so wide that the whole would be impossible to lift. This width also set the dimensions of the sides. This dimension was limited by the 40" lengths of the L-shaped iron purchased.
I then worked out a few other details of the plan. The mirror would sit behind the wood in a 1/8" deep rabbet. The ends of the sides will then need a mating rabbet to fit the frame together. The angle on the corners is approximately 13°. Once I was sure everything would fit as planned, I carried the four boards downstairs. The first task was labelling them (front, back, top, bottom, etc.) and ripping to the correct width. The edges were not straight, so it was necessary to trim both sides of each board. The best side of each board was determined and this was placed against the fence and 1-2" was cut off depending on the board. This newly cut side was then held against the fence while cutting to 5 1/2". There was burning on some boards probably due to the varied warp.
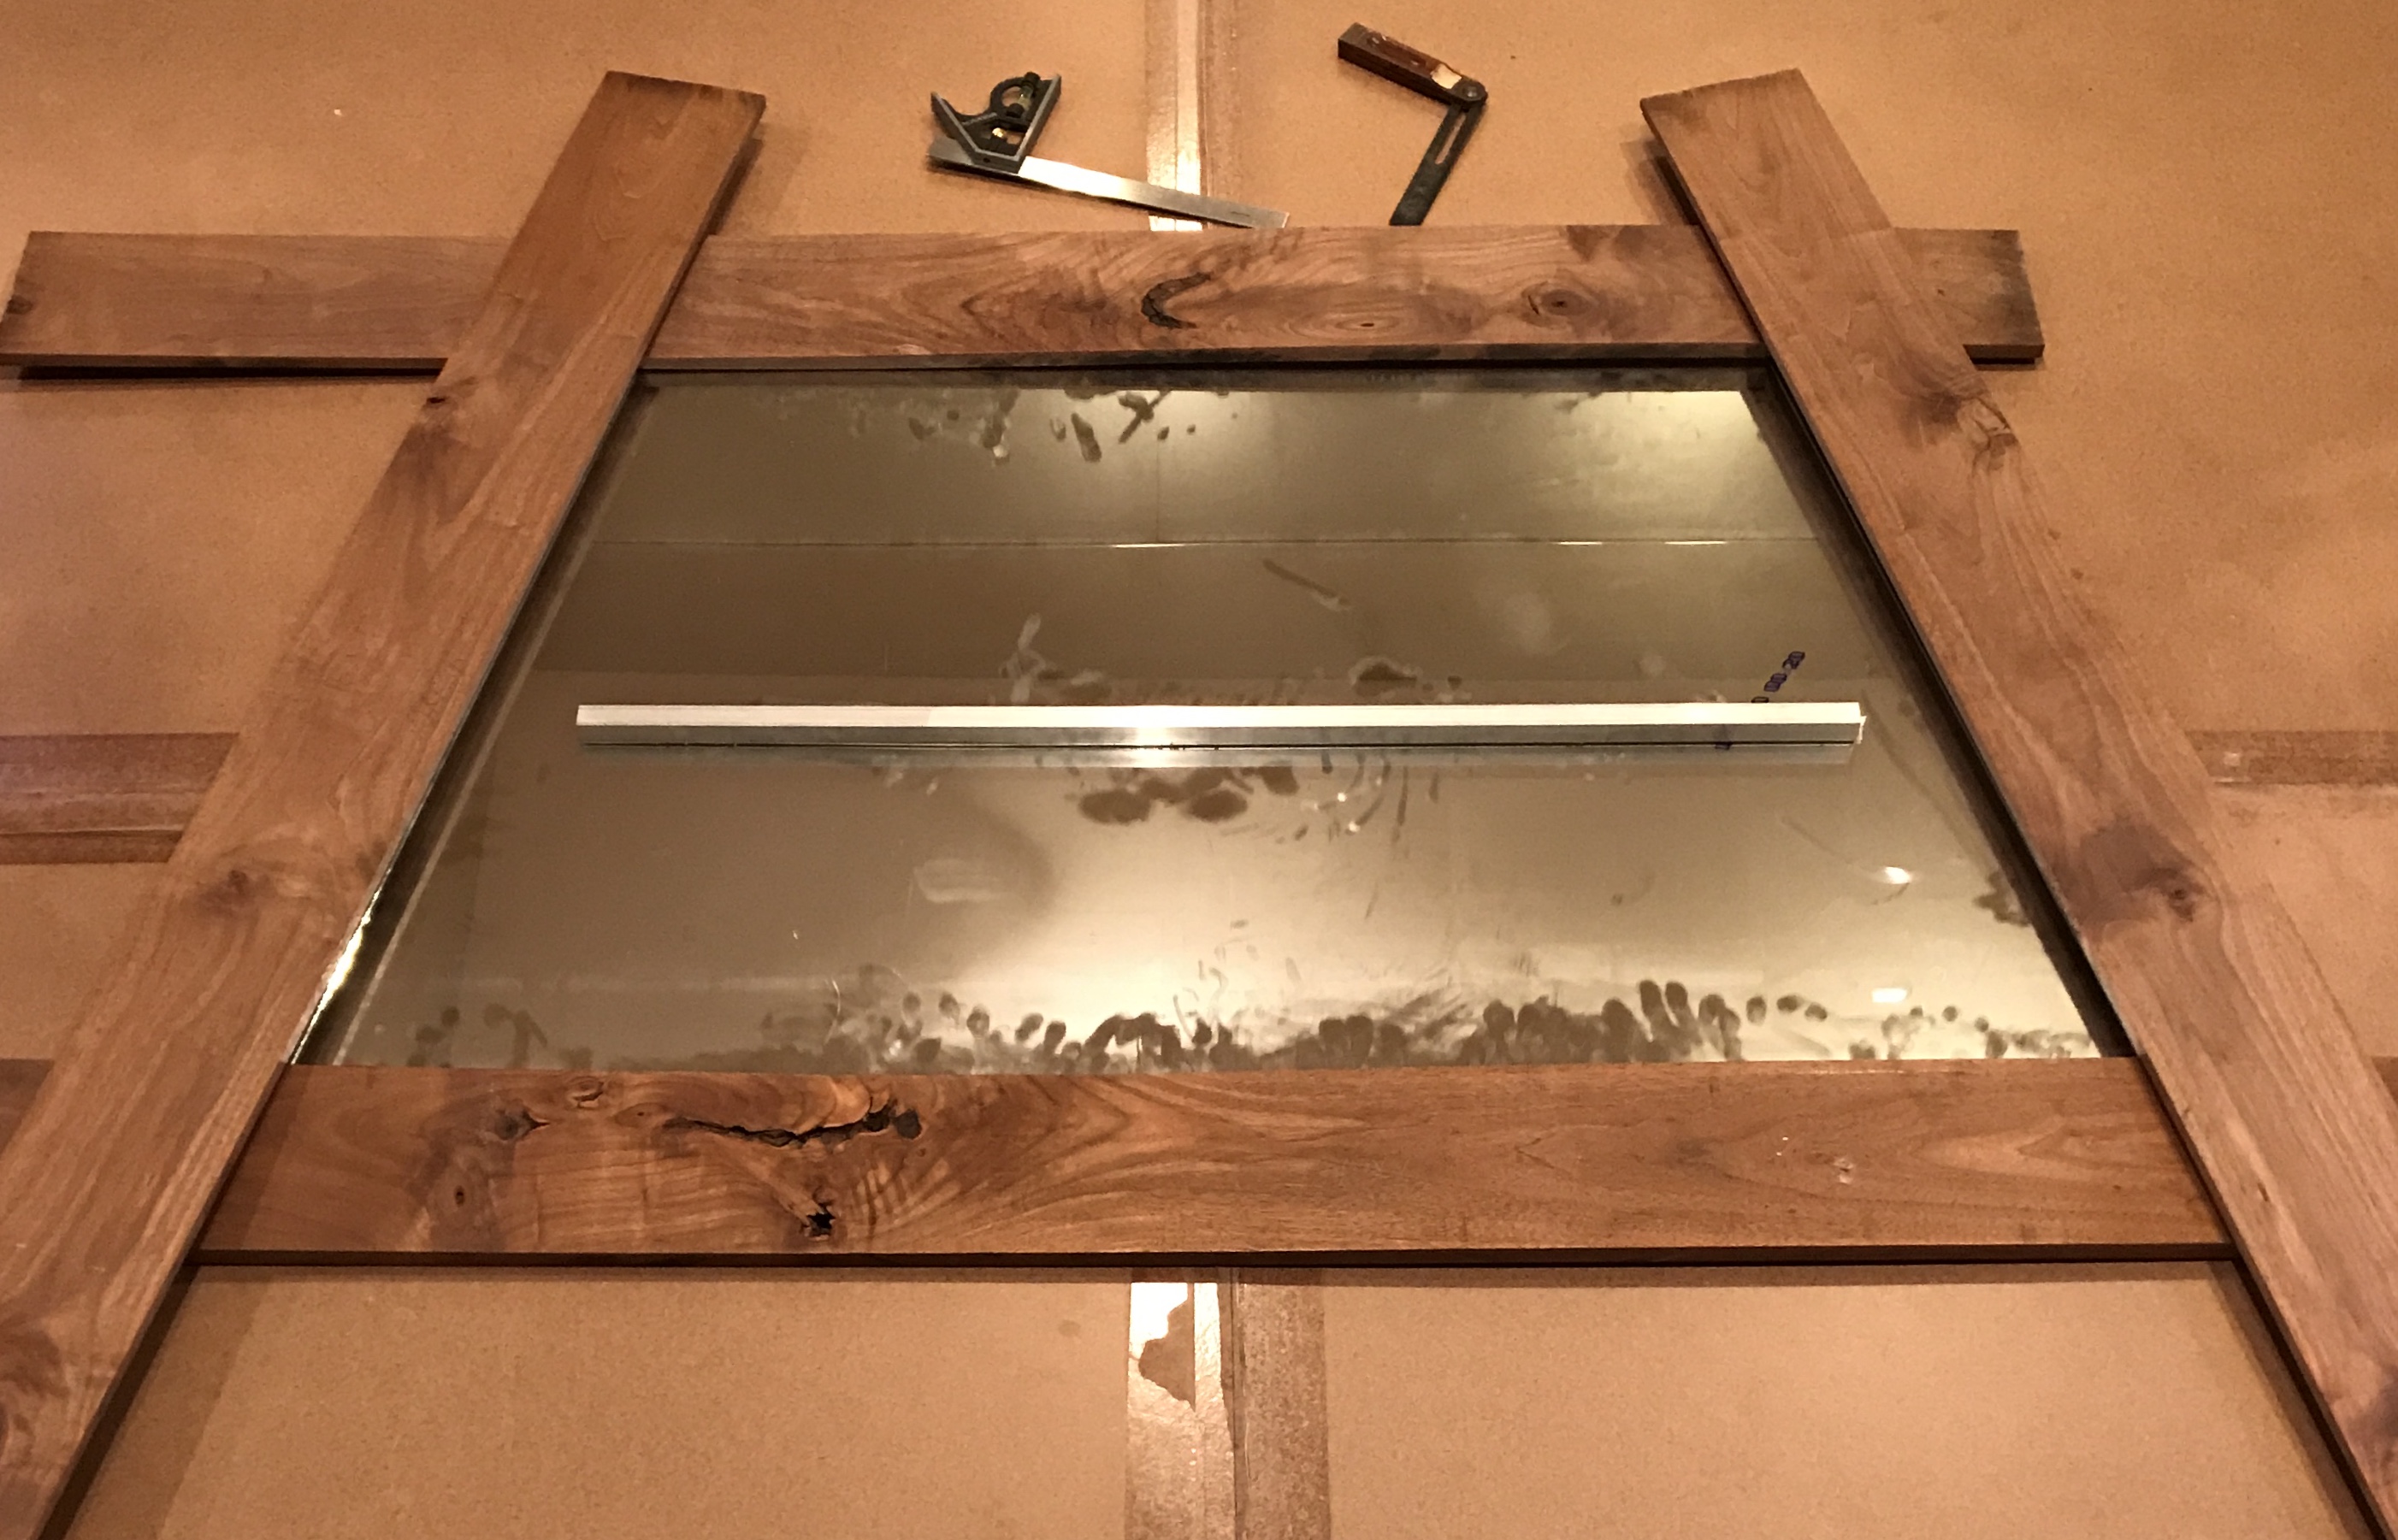
The boards were laid out against the back of the mirror as shown above. Intersections of boards were marked on the sides as well as the locations of the side boards on the top and bottom boards. The angle of the mirror was transfered to the miter gauge. The ends of the side boards were cut about 3/8" long to account for the lap joint with the top and bottom boards. This lap was then cut on the front faces of the sides. The fit was less than desired.
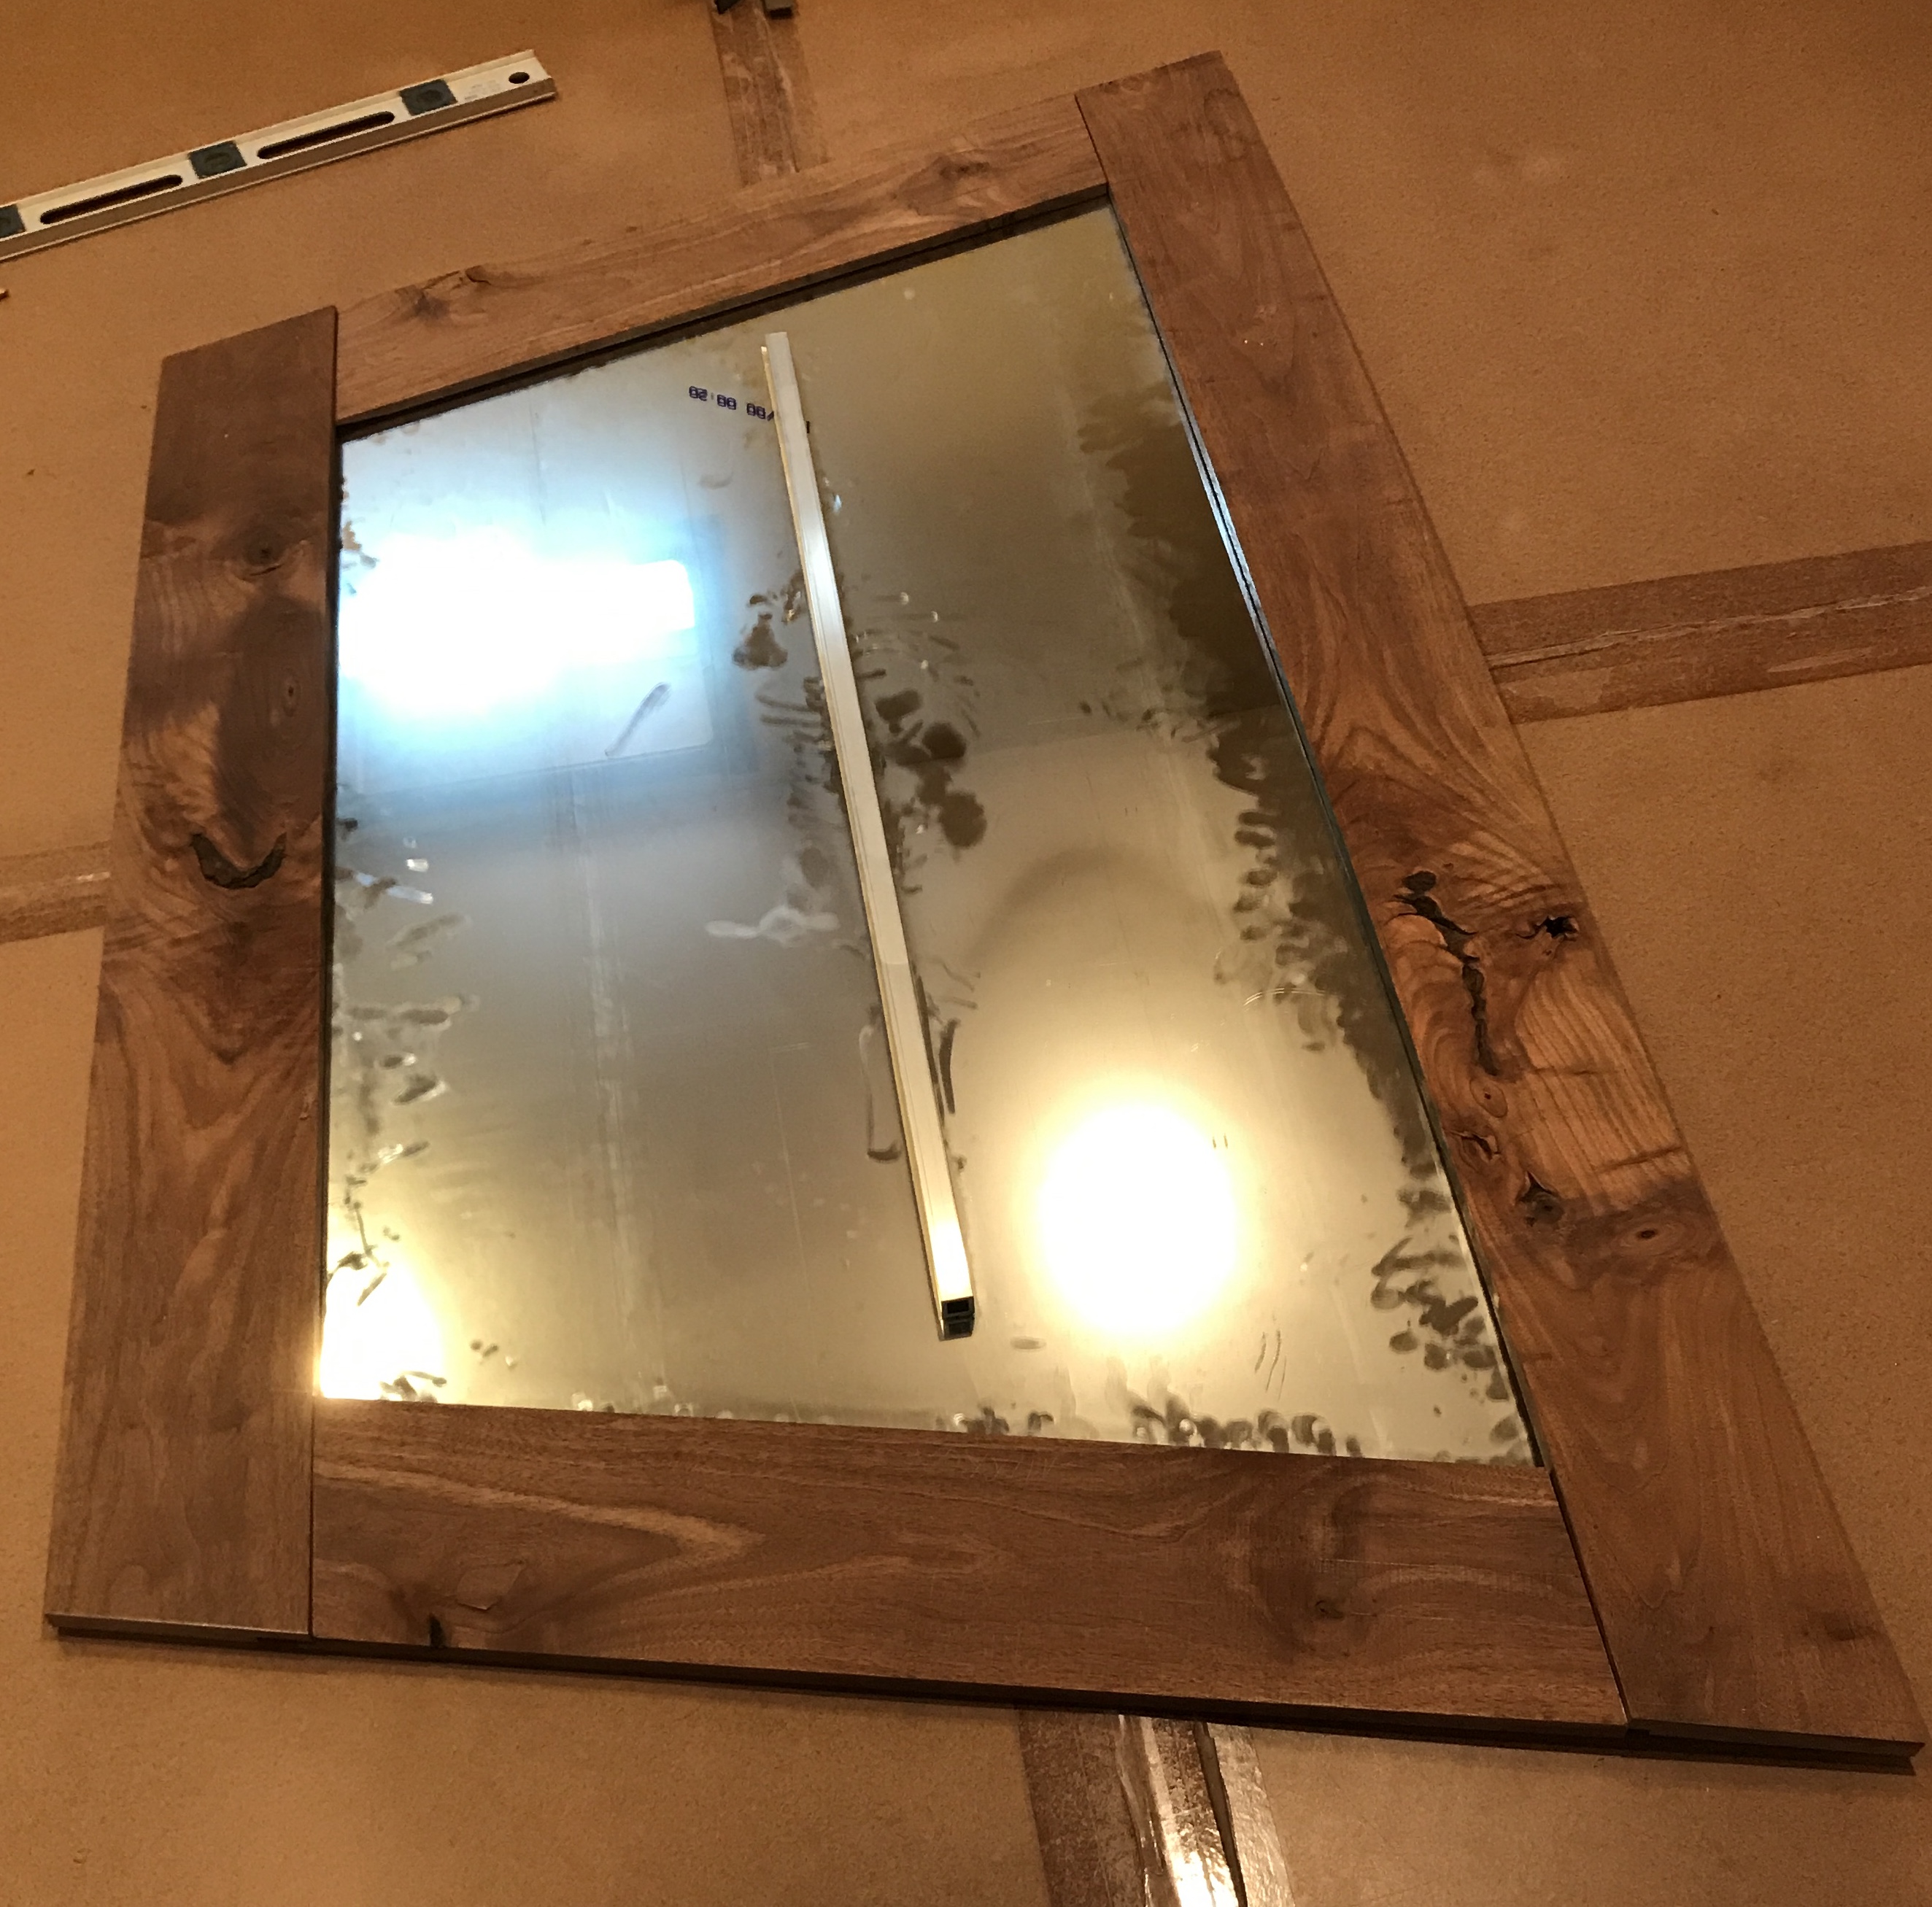
The angles on the ends of the sides were adjusted at the table saw to get a better fit. The rabbet on the bottom board was made about 1/2" wider to provide a little play with now shortened sides. The frame was fit around the mirror and the ends of the top and bottom boards were marked. These marks were sneaked up on with the table saw. Two were quite challenging to cut as most of the board was laying off the table. The miter was adjusted for each of the four ends to match the marked lines. In the end a pretty good fit was established as seen the picture below.
The frame was then turned over and the mirror placed in it. This pointed out the pronounced warp on the top. If the mirror was not pressed up against the top dado in the corners there was no overlap in the middle. To make sure that the mirror would always be pushed up tight spacers were made for the bottom dado. These were glued in place. Each of the corner angles were transfered from the frame to the angle iron braces. The four angles were marked 38" apart on the two sides. The braces were labeled either left or right. The angles were then cut with a hack saw.
The braces were cleaned up. A wire wheel was placed in the drill press and the iron was held against it as it was moved back and forth. This did a pretty good job of removing the scale. The surface is now shiny, but pitted. The ends were also chamfered with a file. I am not sure how well it will take the bluing, so I will test it out with one of the cutoffs. I hope it takes the bluing well, because I like the idea of rough steel with the rough wood.
The wire wheel brushing was a very dirty job. A cardboard box was placed downwind, to the right of the drill press, to catch some of the dust. I wore an apron and rubber gloves in addition to the usual safety glasses. It took over one hour to clean up one brace. It was quite the upper body workout.
My Mechanics Insights has a nice video on both hot and cold bluing. For cold bluing clean the parts with acetone and always handle with rubber gloves to avoid fingerprints. The bluing liquid should be transfered to a second container so as not to contaminate the original container. Paint the bluing solution onto the steel. Wash the part in water and dry. Then coat the part in oil and leave for 12 hours to set the color. After removing the oil the part should be a nice blue-black color.
According to the MSD Super Blue contains a few percent each: selenous (or selenious) acid, H2SeO3, nitric acid, cupric nitrate, and cupric phosphate. Selenous acid is a weak diprotic acid. The bluing process deposits a coating of copper selenide on the steel.
I took one of the cutoffs and filed the edges. I sanded one side first on the belt sander and then with 150, 220, and 600-grit paper. The other side was left as it came off of the wire wheel. The cutoff was degreased with acetone. I then poured a very small amount of the bluing into a plastic container. Using a small paintbrush the bluing was spread onto the part. The part quickly turned black. The part was rinsed in a bucket of water and dried with a towel. Oil was wiped onto the part and the part left to sit from 9 am to 9 pm when the oil was removed.
Meanwhile, the boards were sanded. They were first sanded with 100 grit paper on the orbital sander. Then they were sanded with 150 grit paper. The edges were sanded as well as the front faces. Front edges on the long faces were rounded by sanding. A cut off scrap of the hickory was sanded in the same fashion. All of the boards were vacuumed to get rid of any remaining dust. The piece of scrap was treated with tung oil as an experiment. It was left to dry overnight before applying a second coat.
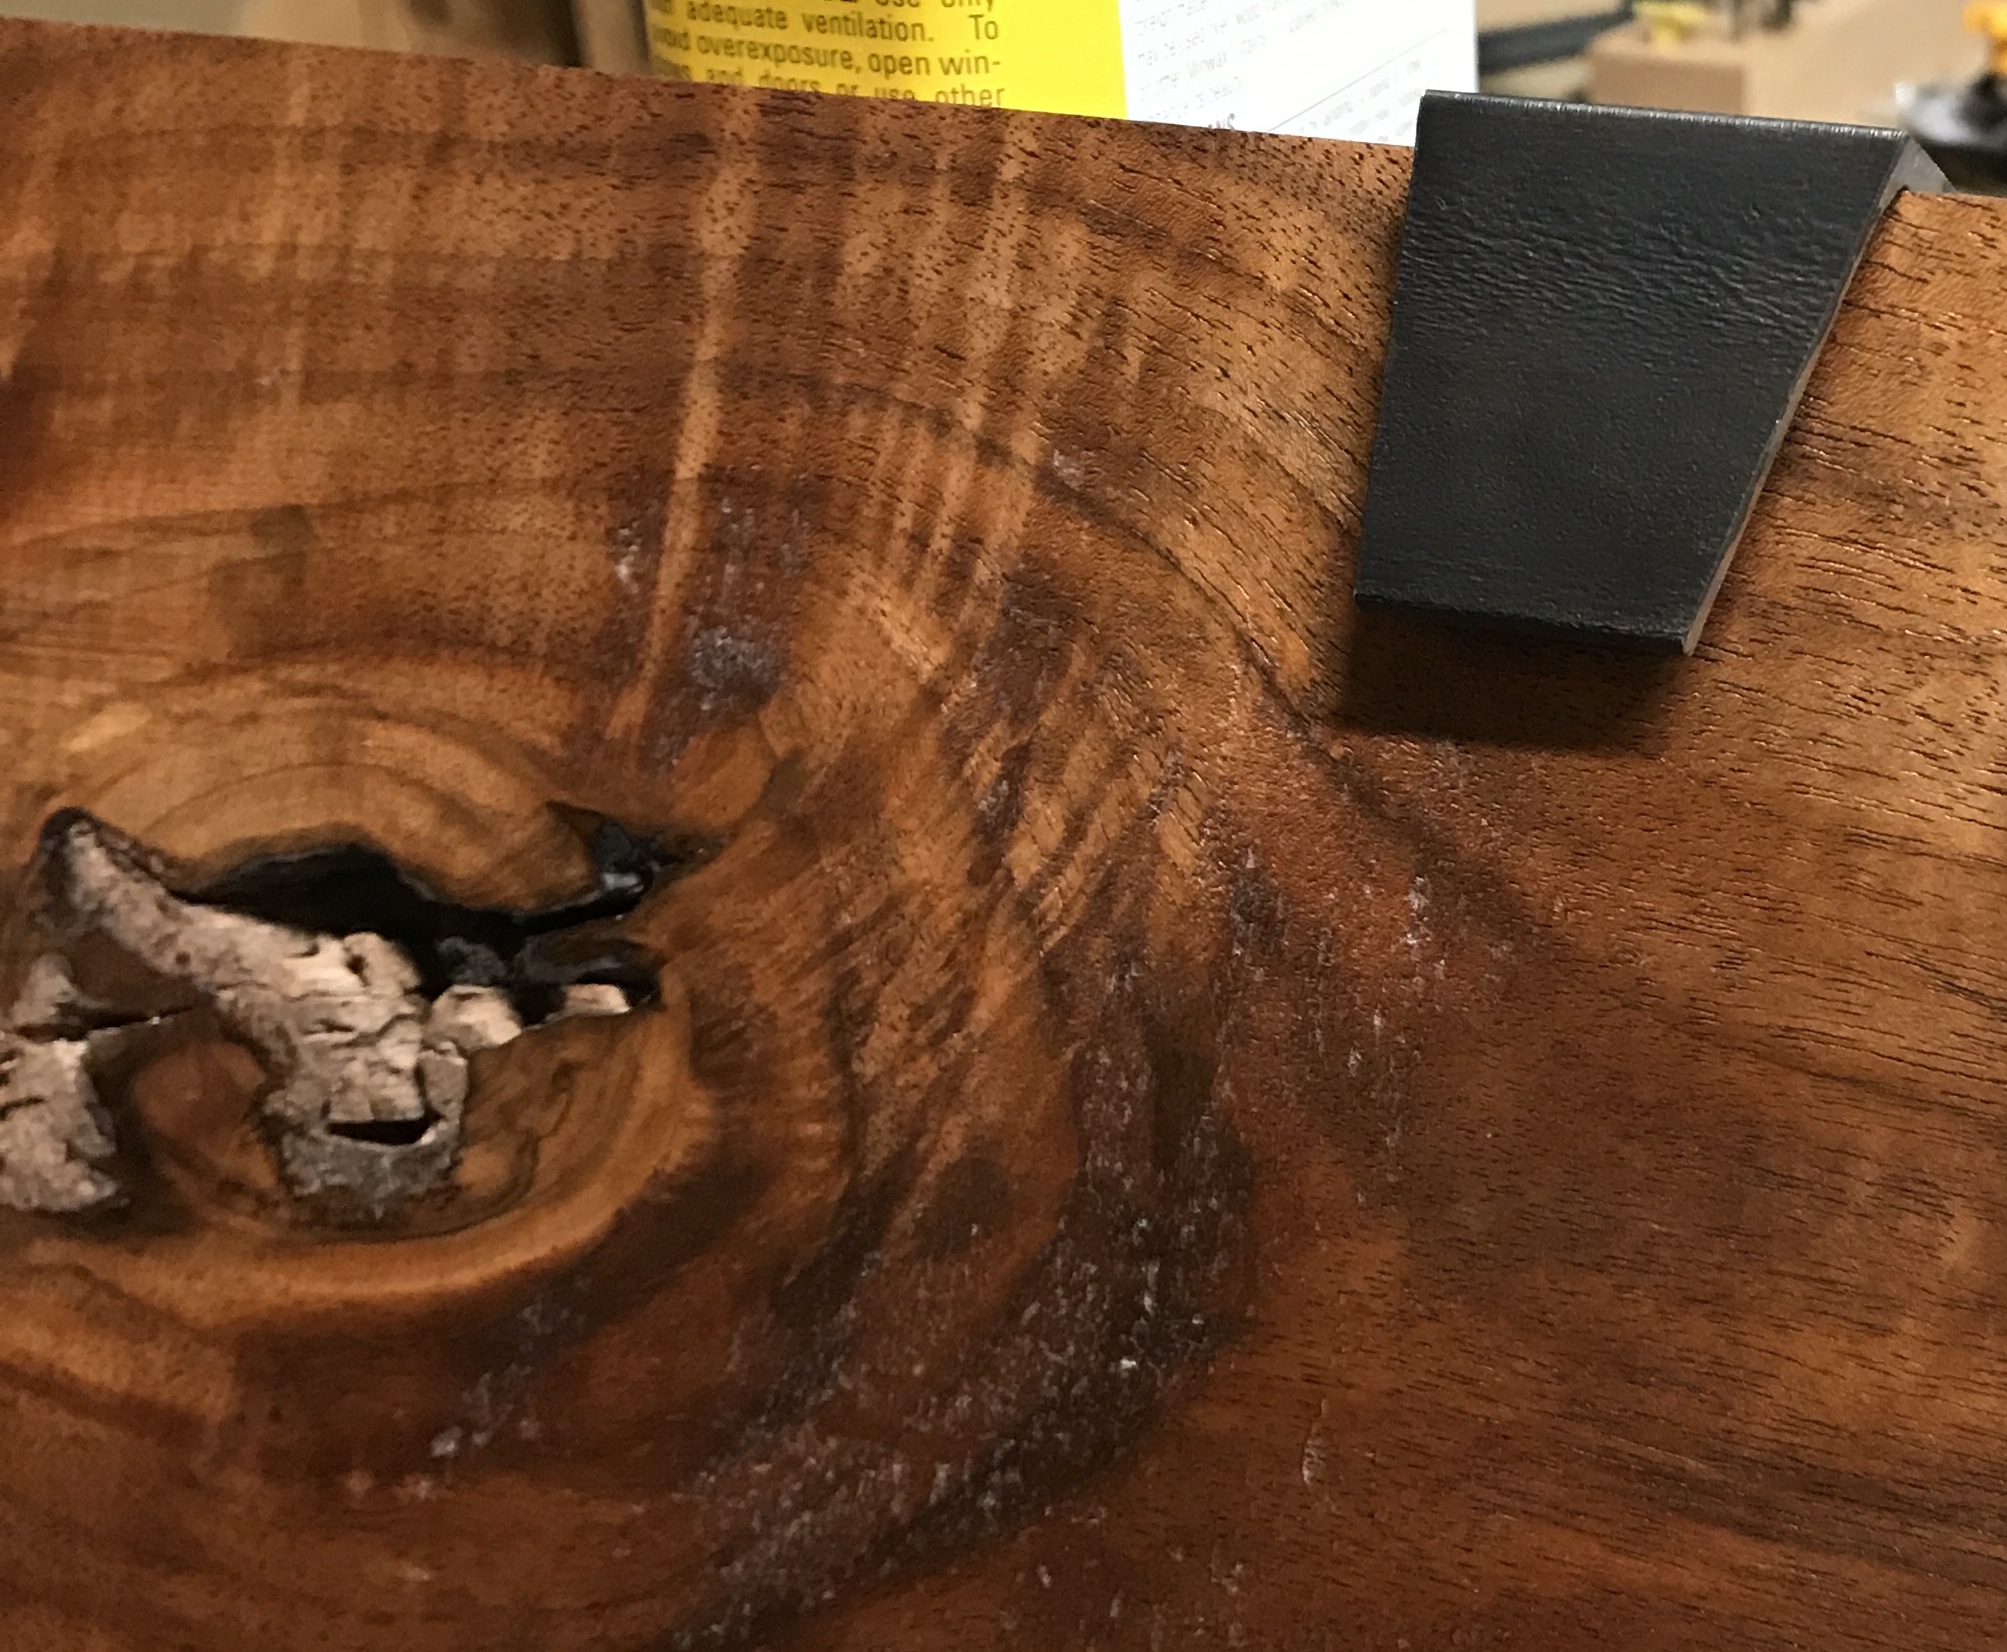
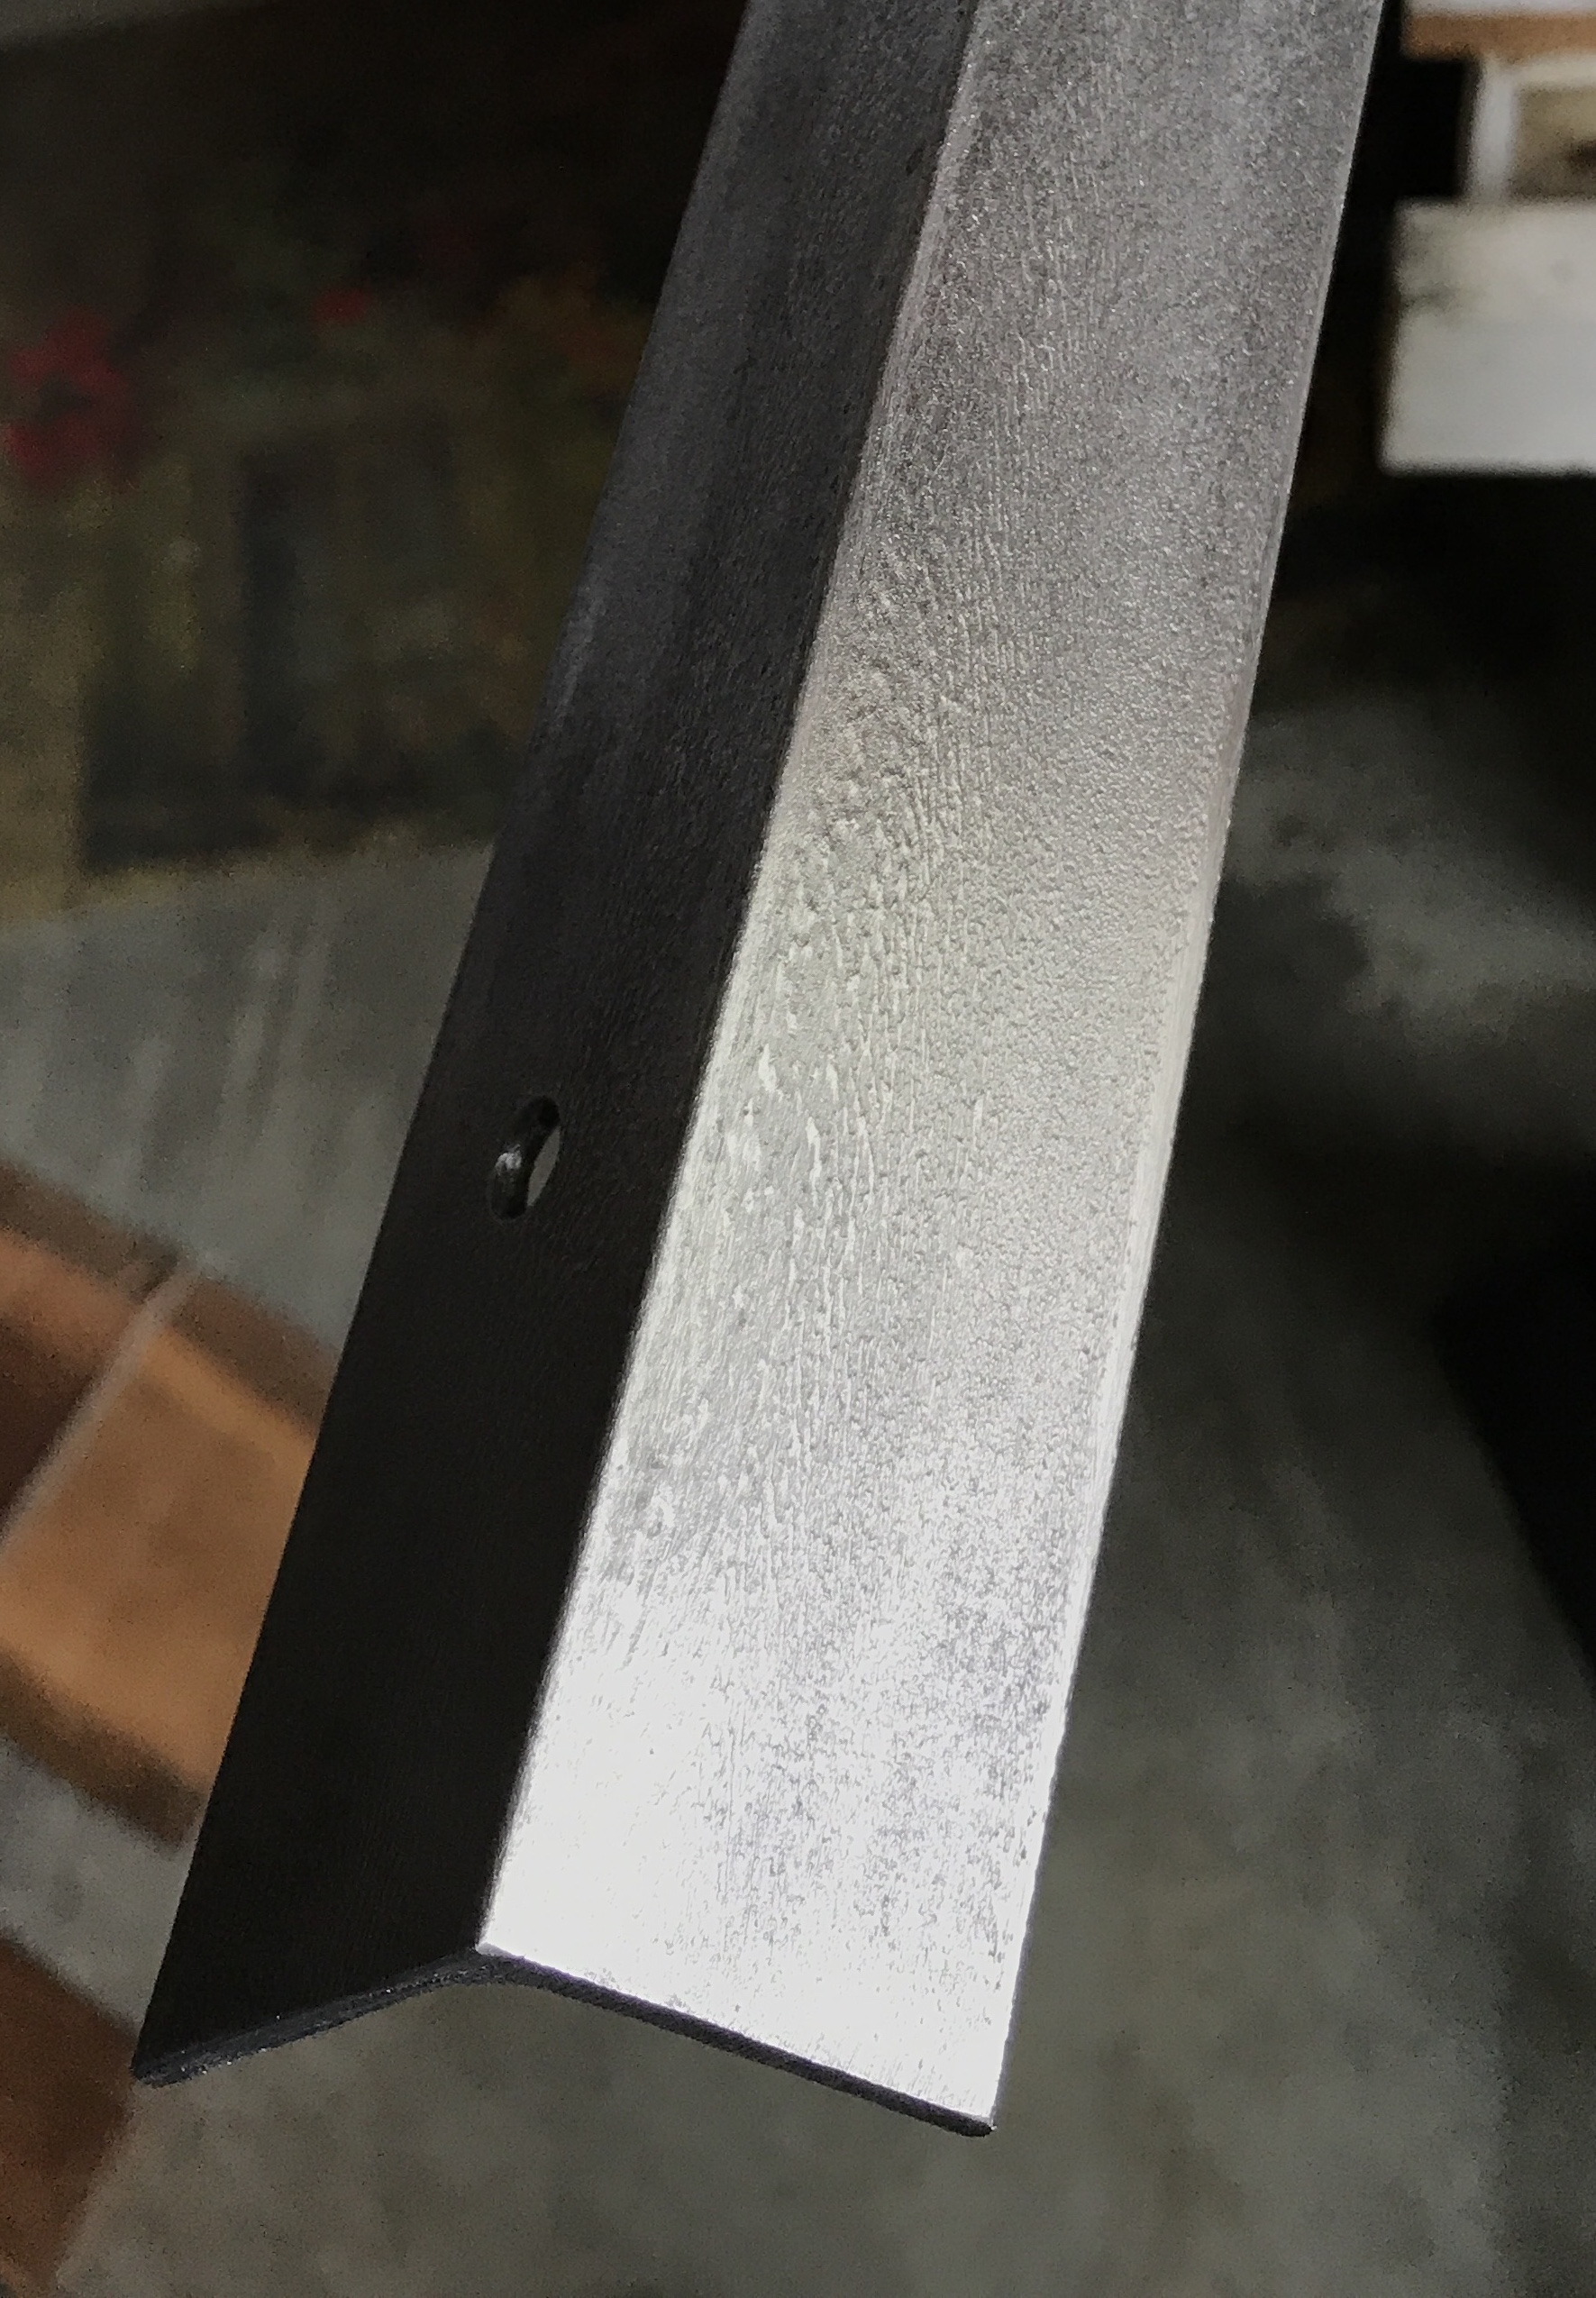
The picture above shows the blued rough finish steel contrasted against the tung oil finished hickory. Rhea agreed that the blued rough finish steel went better with the tung oil finished wood than the sanded and blued finish. The sanded was too smooth and showed some faint blotching that was not apparent on the rough finished steel. The remaining tasks are transferring the holes, drilling the holes, applying the tung oil, bluing the steel braces, installing the mirror clamps, and attaching the hanging wire.
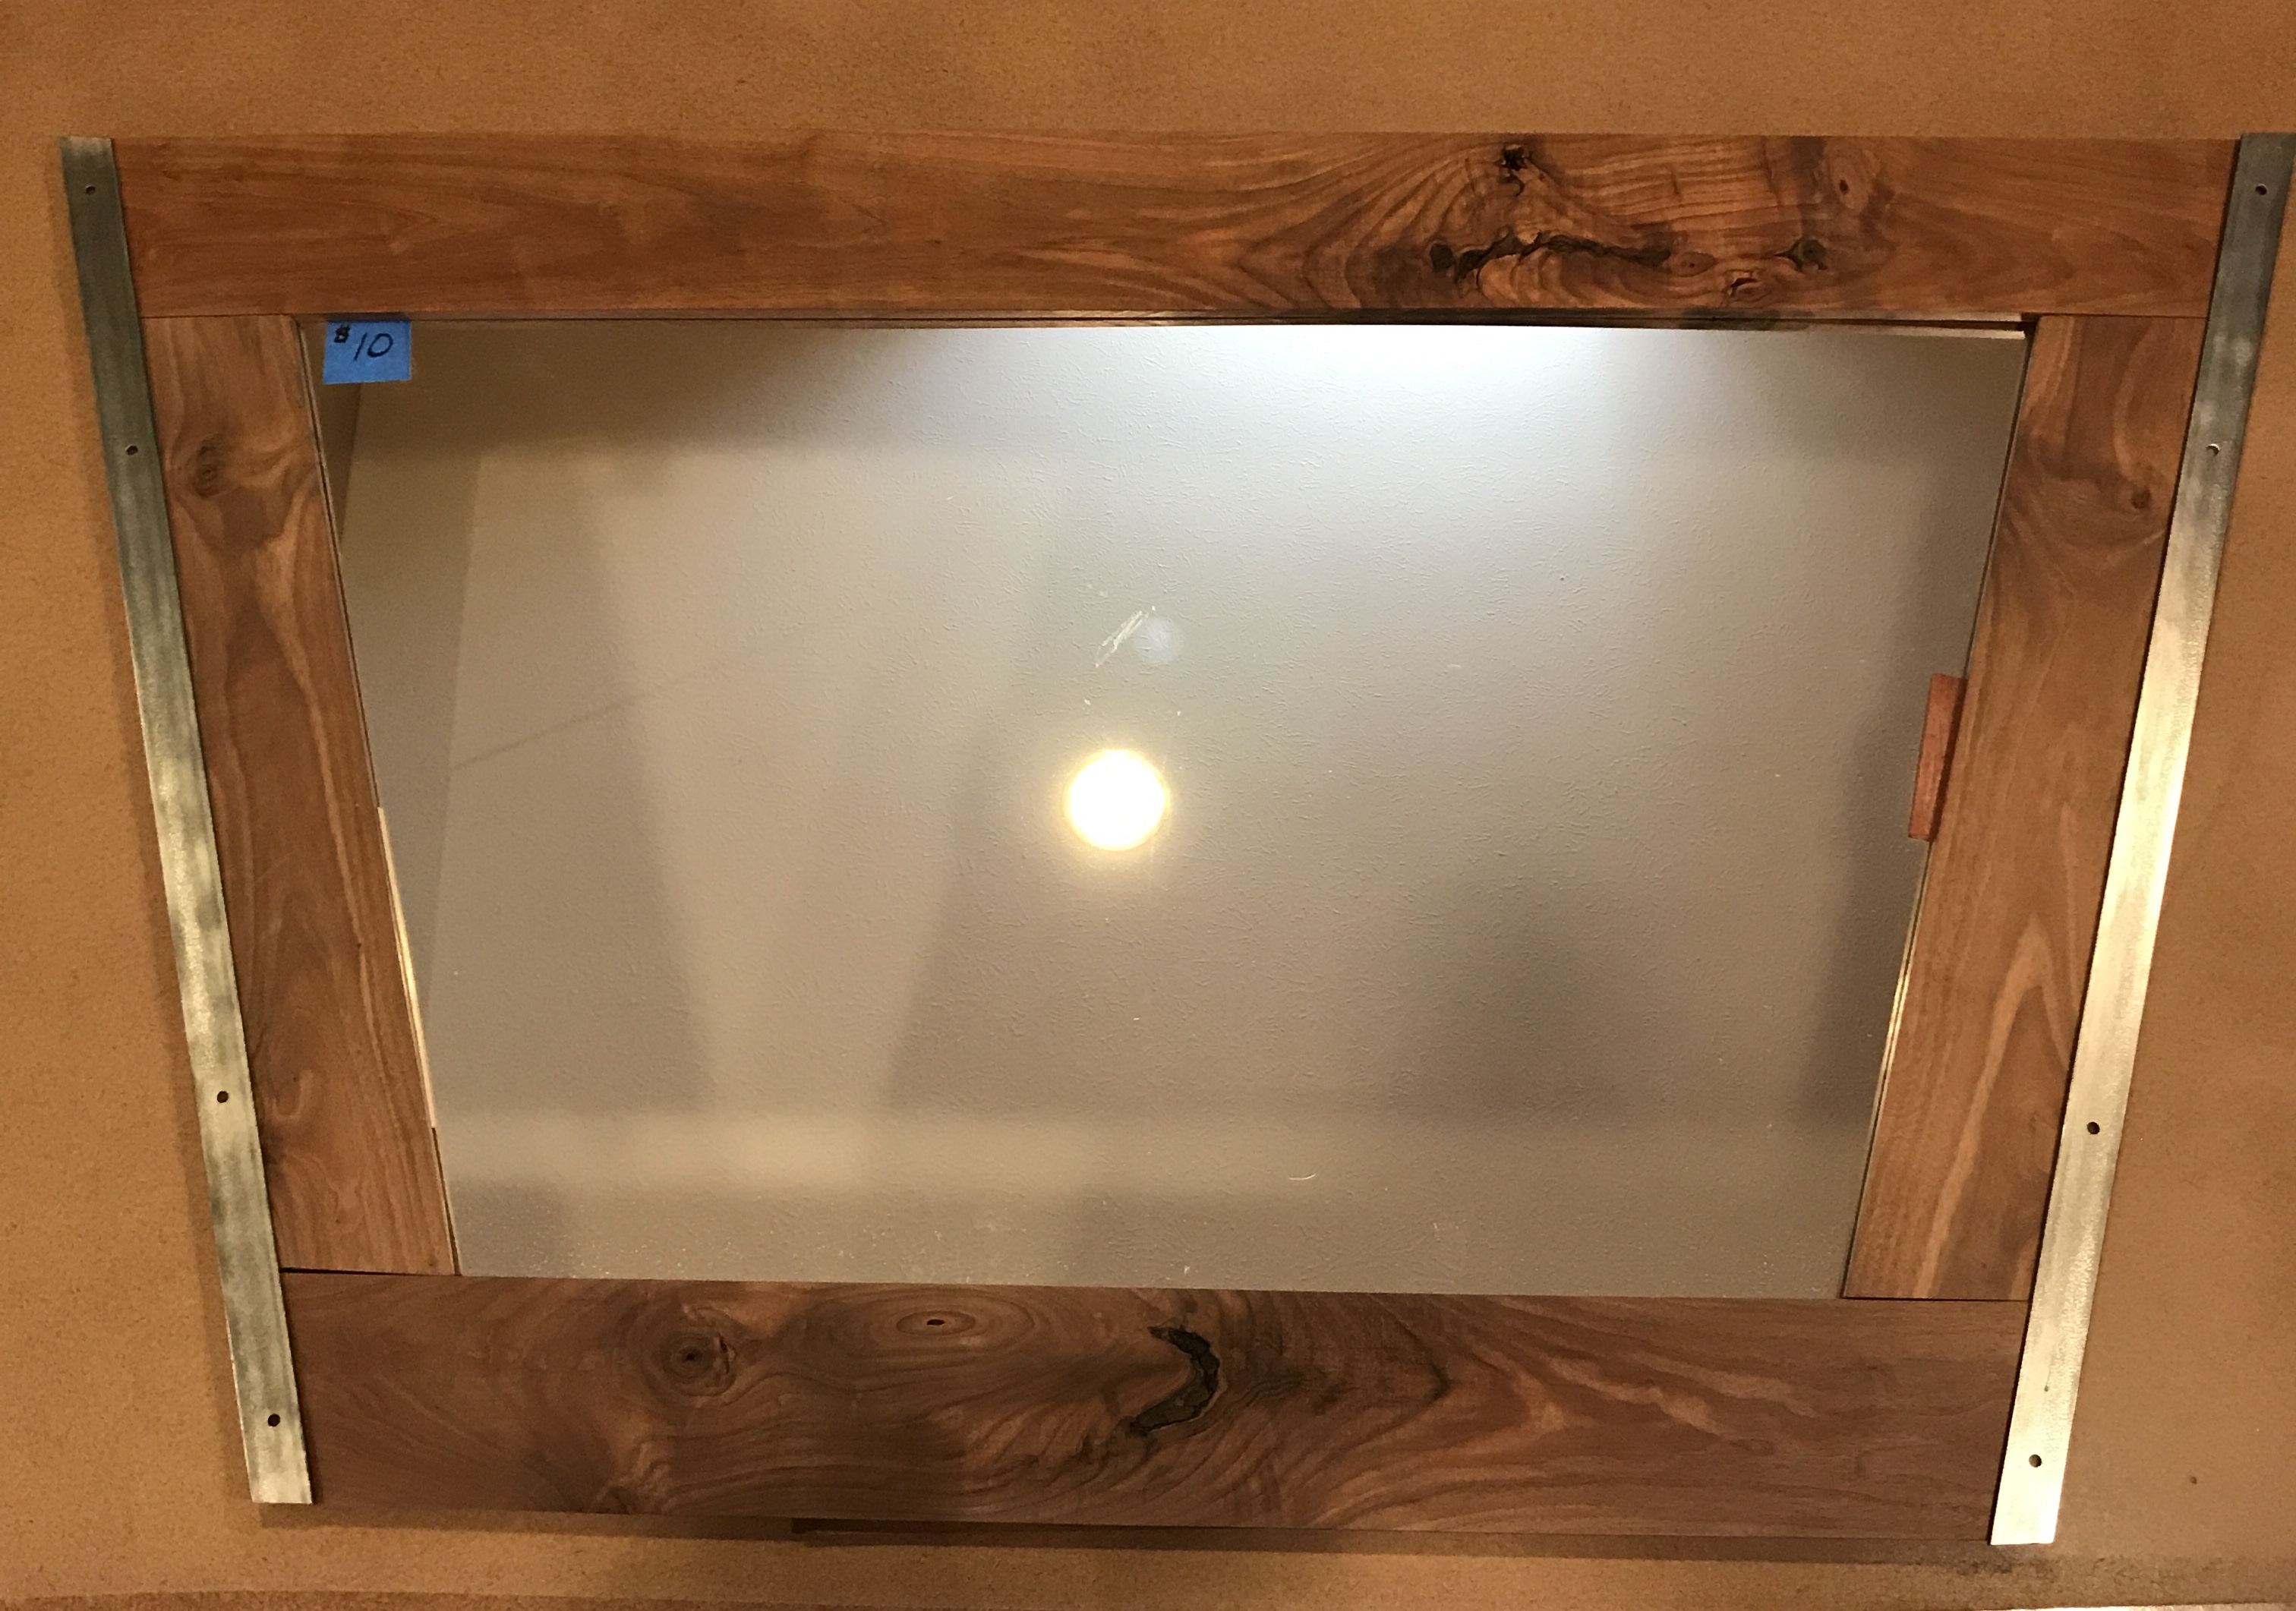
The braces were brought in from the garage and the frame was laid out on the mirror. After some adjusting the frame was held in place and the holes were marked with a 9/32" transfer punch. The holes were circled with a pencil and then the dimples were enlarged with a punch and a hammer. The eight holes were drilled with a 5/16" wood drilling bit. I do not have its equivalent in 9/32"". Much to my dismay an extra hole was drilled. I mistook one of the natural holes in the wood for a transfer mark. I found a matching piece of wood in the cutoffs and will make a plug from it. The picture below shows the frame, mirror and braces all laid out for transferring the holes.
Made a plug on the lathe. I cut the scrap down to a 3/4" cube and held this in the four-jaw chuck. The head was set at a slight angle and the plug was formed. It varied in diameter from 0.300" to 0.350". It was cut off with a saw. Glue was coated on its surface and it was pounded into the hole. A very nicely made soft face hammer was used.
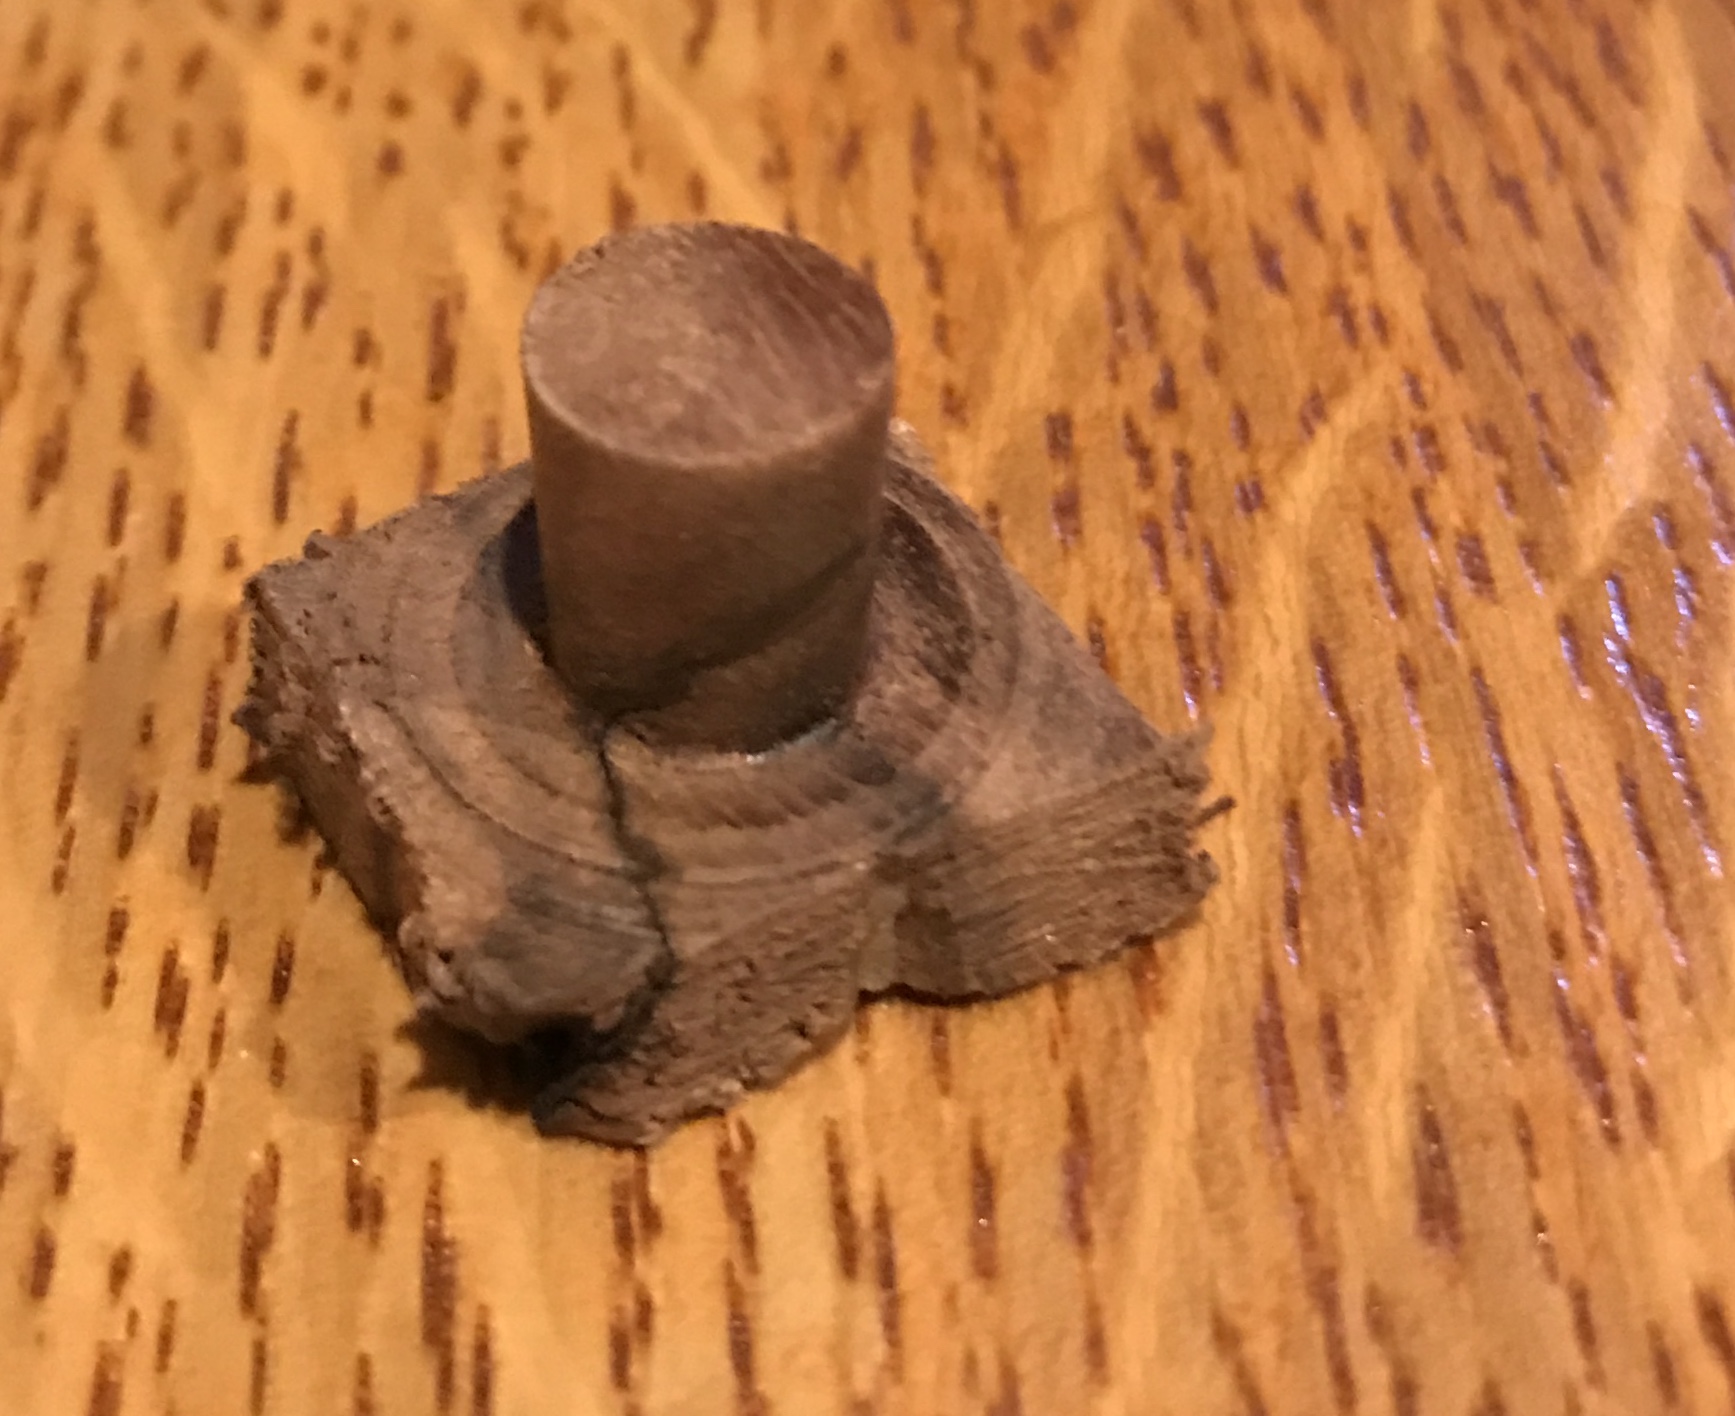
After significant sanding and a little work with a chisel the plug was flush with the surface. The board was vacuumed of sawdust. All four boards were coated with tung oil at 10 am. They all looked pretty impressive when wet with the first coat. The two braces were blued. First, a brace was wiped down with acetone. Second, the bluing was applied while the brace stood in a bucket. Third, the brace and bucket was taken to the outside faucet and the brace rinsed into the bucket. Back in the garage it was dried with a towel and finally, coated with oil. The process was repeated on the second brace. I've got my fingers crossed while awaiting the outcome.
A second coat of tung oil was rubbed onto the boards. The blued steel looks fabulous! However, I do not like the look of the stainless steel screws against the blackened steel. There is too much contrast. I could blue some screws... What about hickory screws instead!?! I don't know what this will look like. I already like the contrast between the blued steel and the tung oil finished hickory, ergo try some wooden screws. Square heads that fit a standard wrench should be simplest. They probably need 1 1/4" of threads. Standard nuts will be used as they will not be seen. I was unable to cut threads in the hickory. A die just reduced the diameter of the wood. Cutting threads with the lathe was problematic due to the nature of the grain. Purchased some black oxide coated screws along with matching washers and nuts.
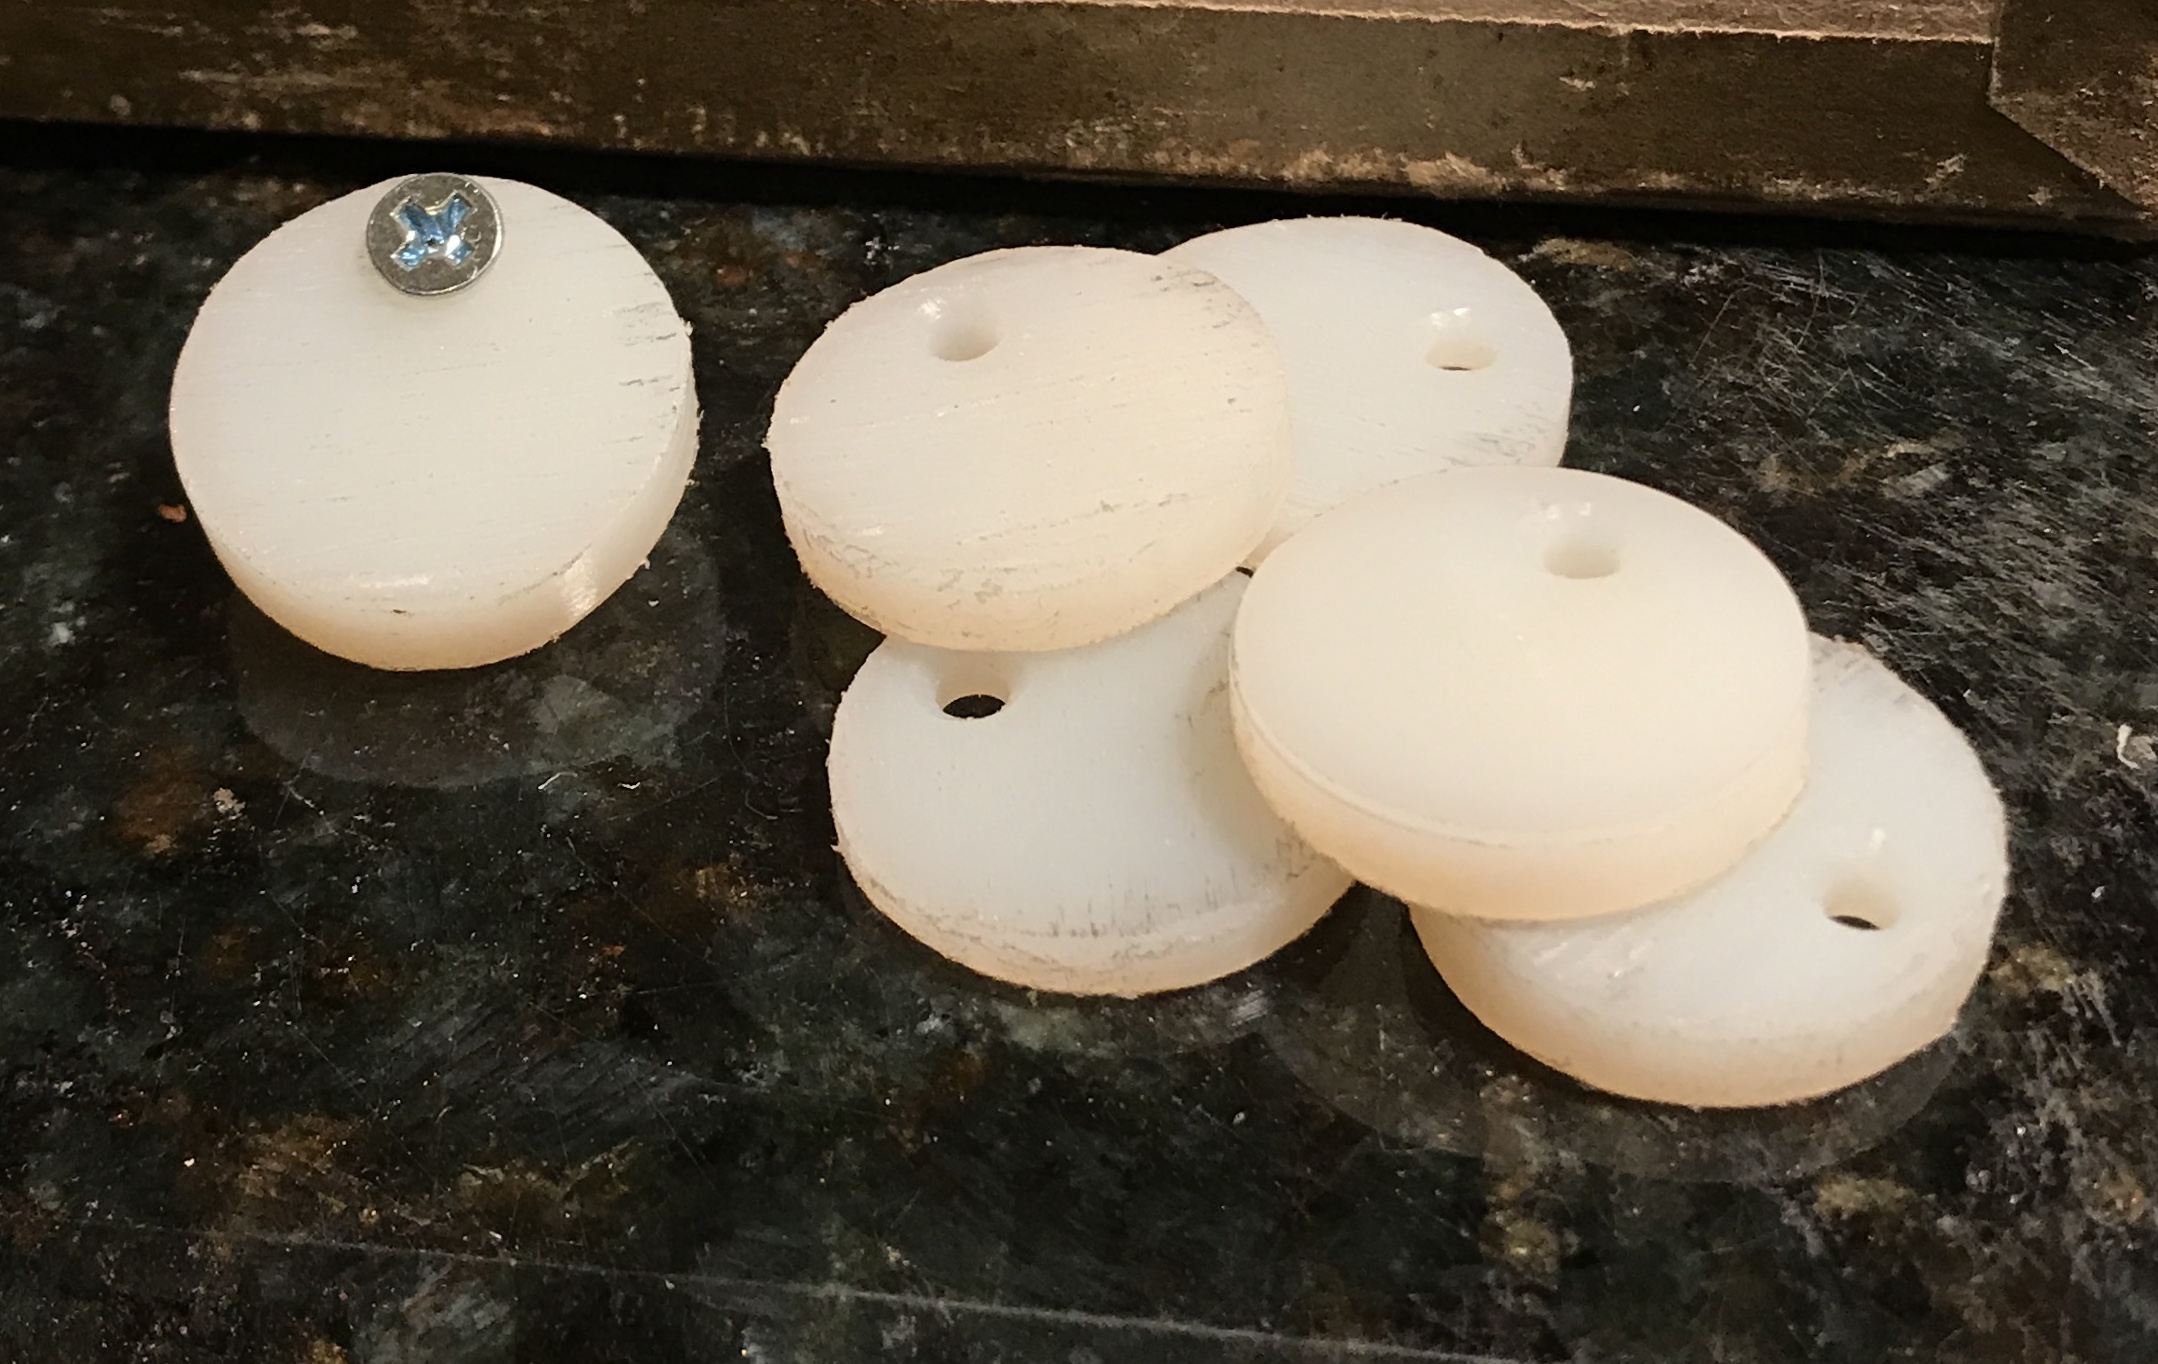
Made some mirror holders from nylon. The 1" nylon rod was placed in the lathe, faced, and cleaned up. Using the cutoff tool was unsuccessful. So the rod was held in the vise using a vee block. The hacksaw quickly produced six disks. The edges were filed. A spot was marked about 3/16" in from the thinnest edge of each disk. These spots were center punched and drilled with a #29 drill (0.140"). This matches the diameter of the #6-5/8" wood screws chosen to hold the disks in place. The holes were lightly chamfered on one side and countersunk for the screws on the other. The picture below shows the finished mirror holders.
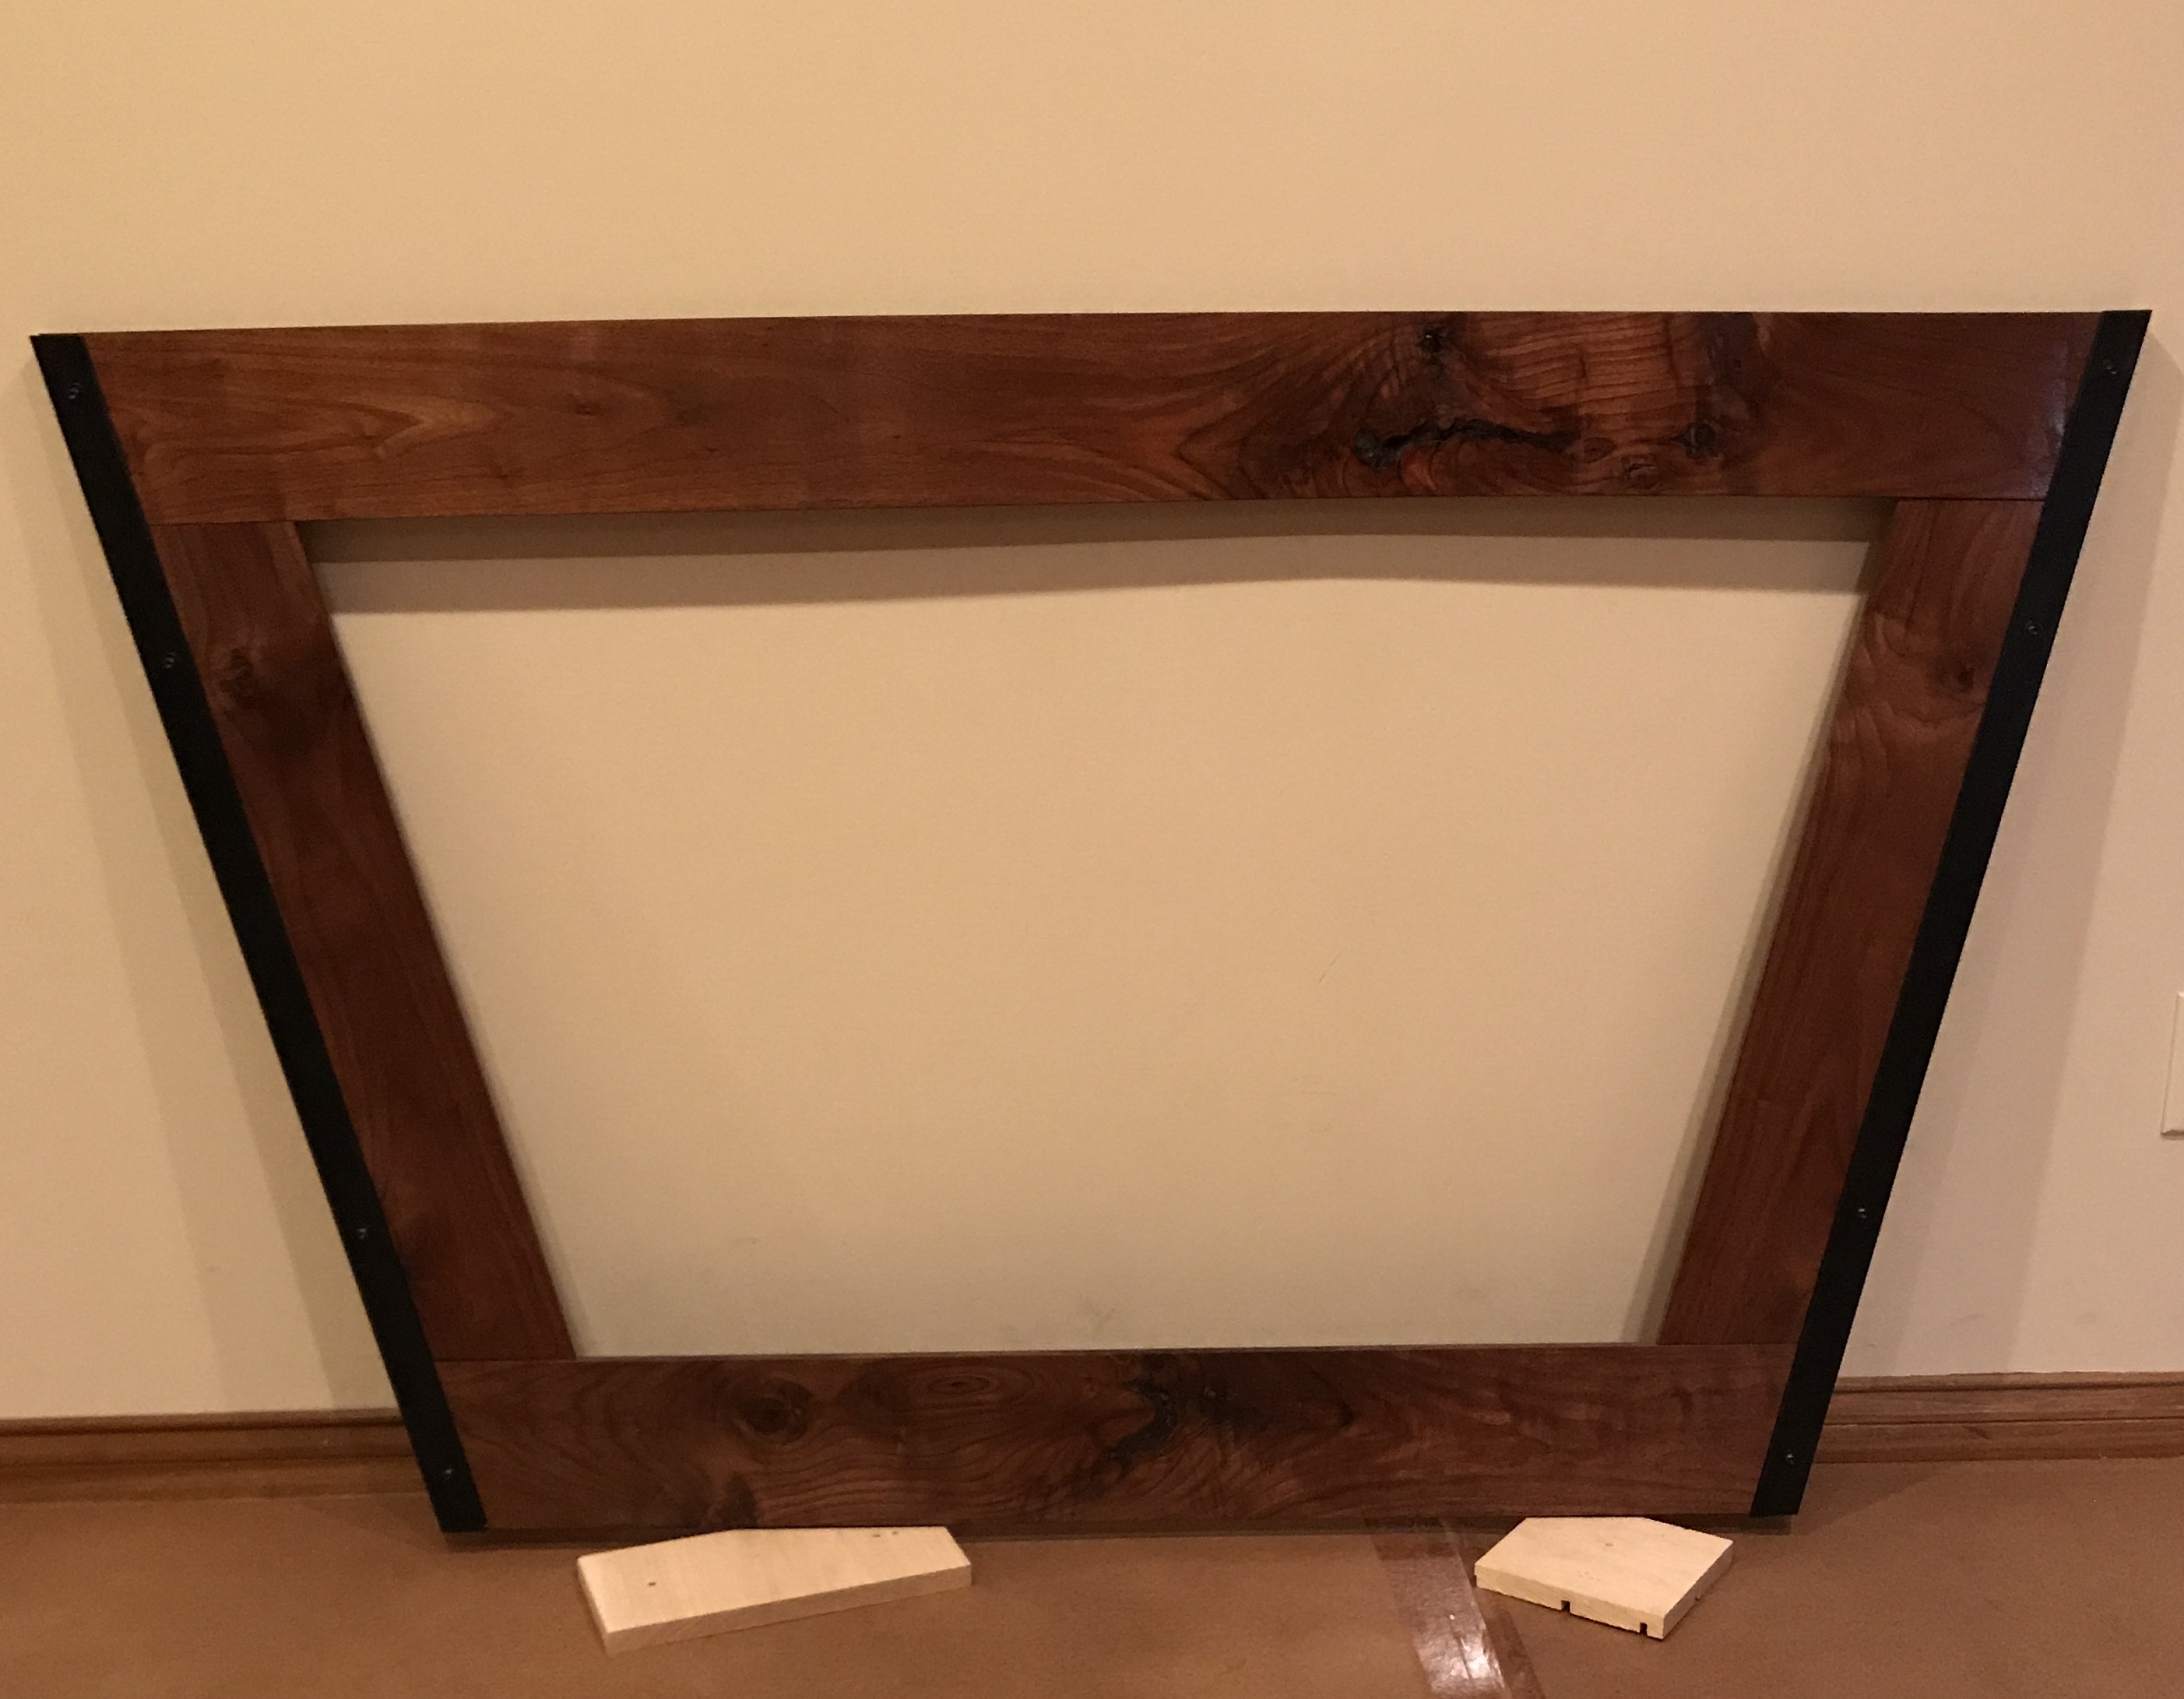
Today was the put it together day. The screws arrived and look nice. The boards were laid out on 3/4" thick scrap on the floor. The braces were then screwed into place. The picture below shows the empty frame. After flipping the frame over the mirror was put in place, or at least an attempt was made to put it in place. The spacers in the bottom were too wide by about 3/32". Additionally, the mirror needed to be moved further to the left side or there was a gap at the top corner. To fix the problems a knife and chisel were used to remove wood from the spacers and from the side of the rabbet on the left frame piece. The mirror fit after these adjustments.
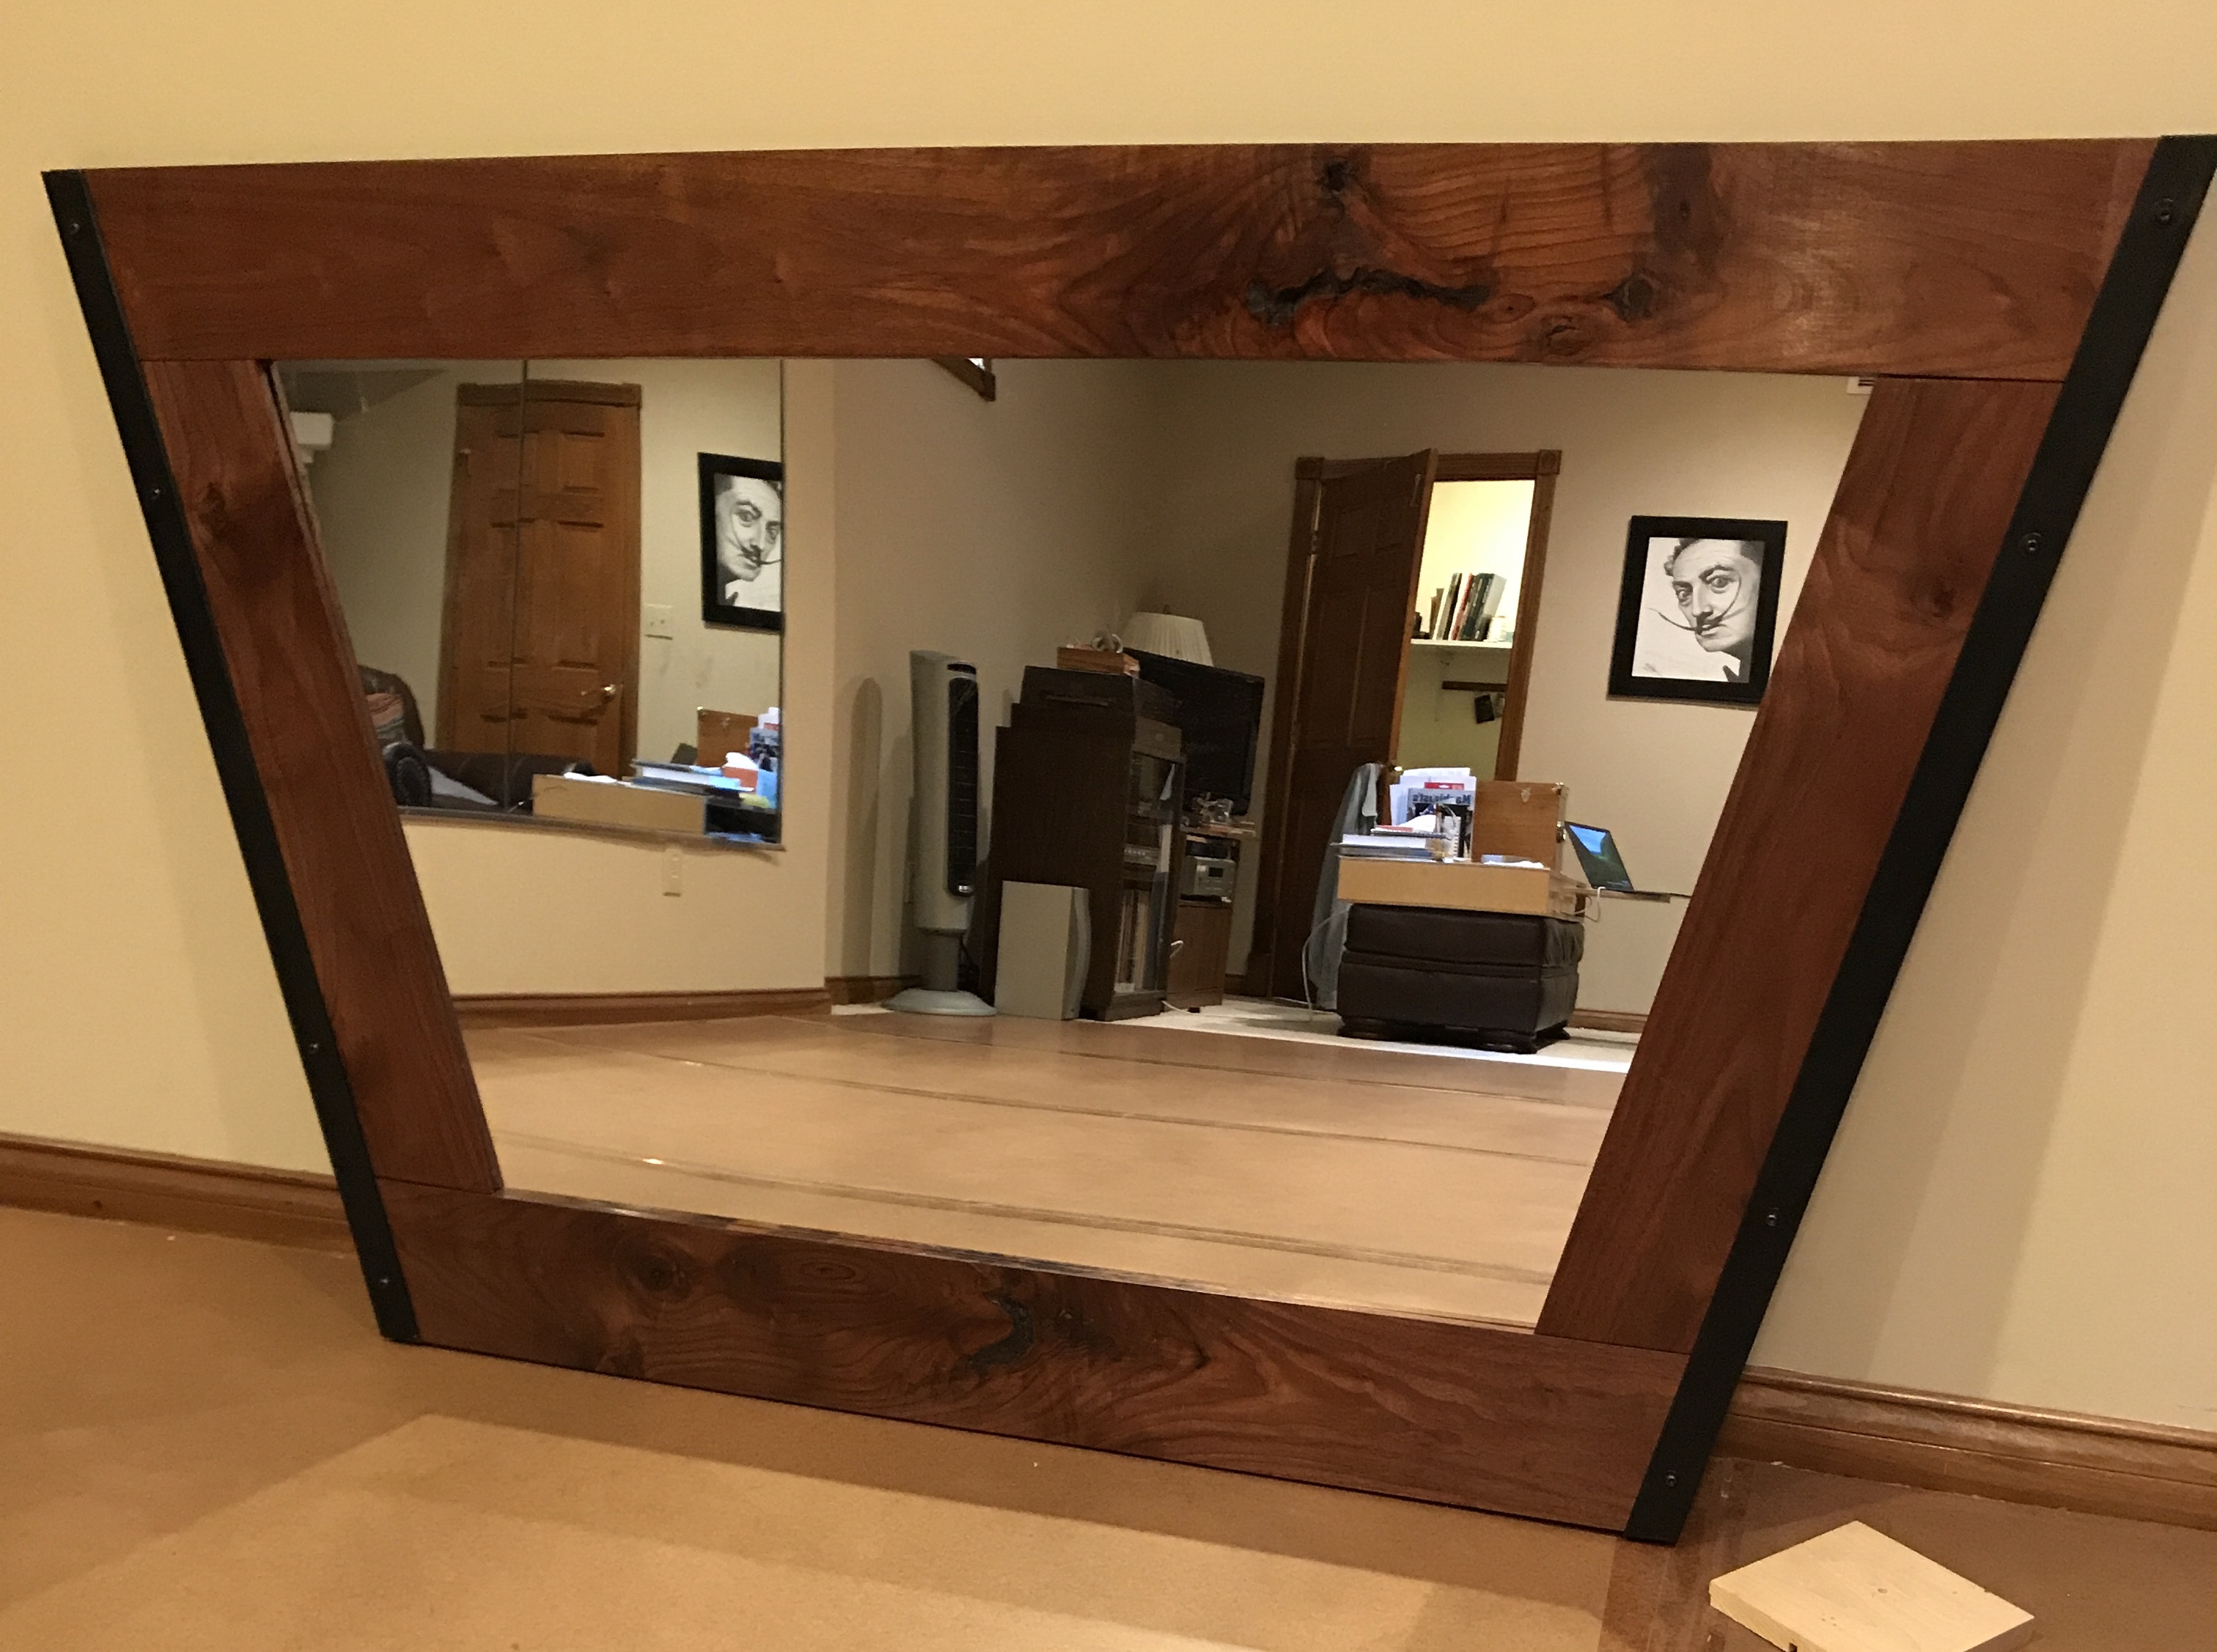
The mirror holders were then placed around the mirror: two for the top and bottom and one each for the sides. The screws in the holders were used to mark their positions. Holes were drilled about 1/4" deep for the screws. The mirror holders were screwed into position. The picture below shows the completed mirror.
I sent a text to Doug to let him know the frame was finished. I also informed him that I do not have picture hanging wire. I did not send a picture. I want to surprise Doug and Sue. They will pick it up next week when they return from Iowa.
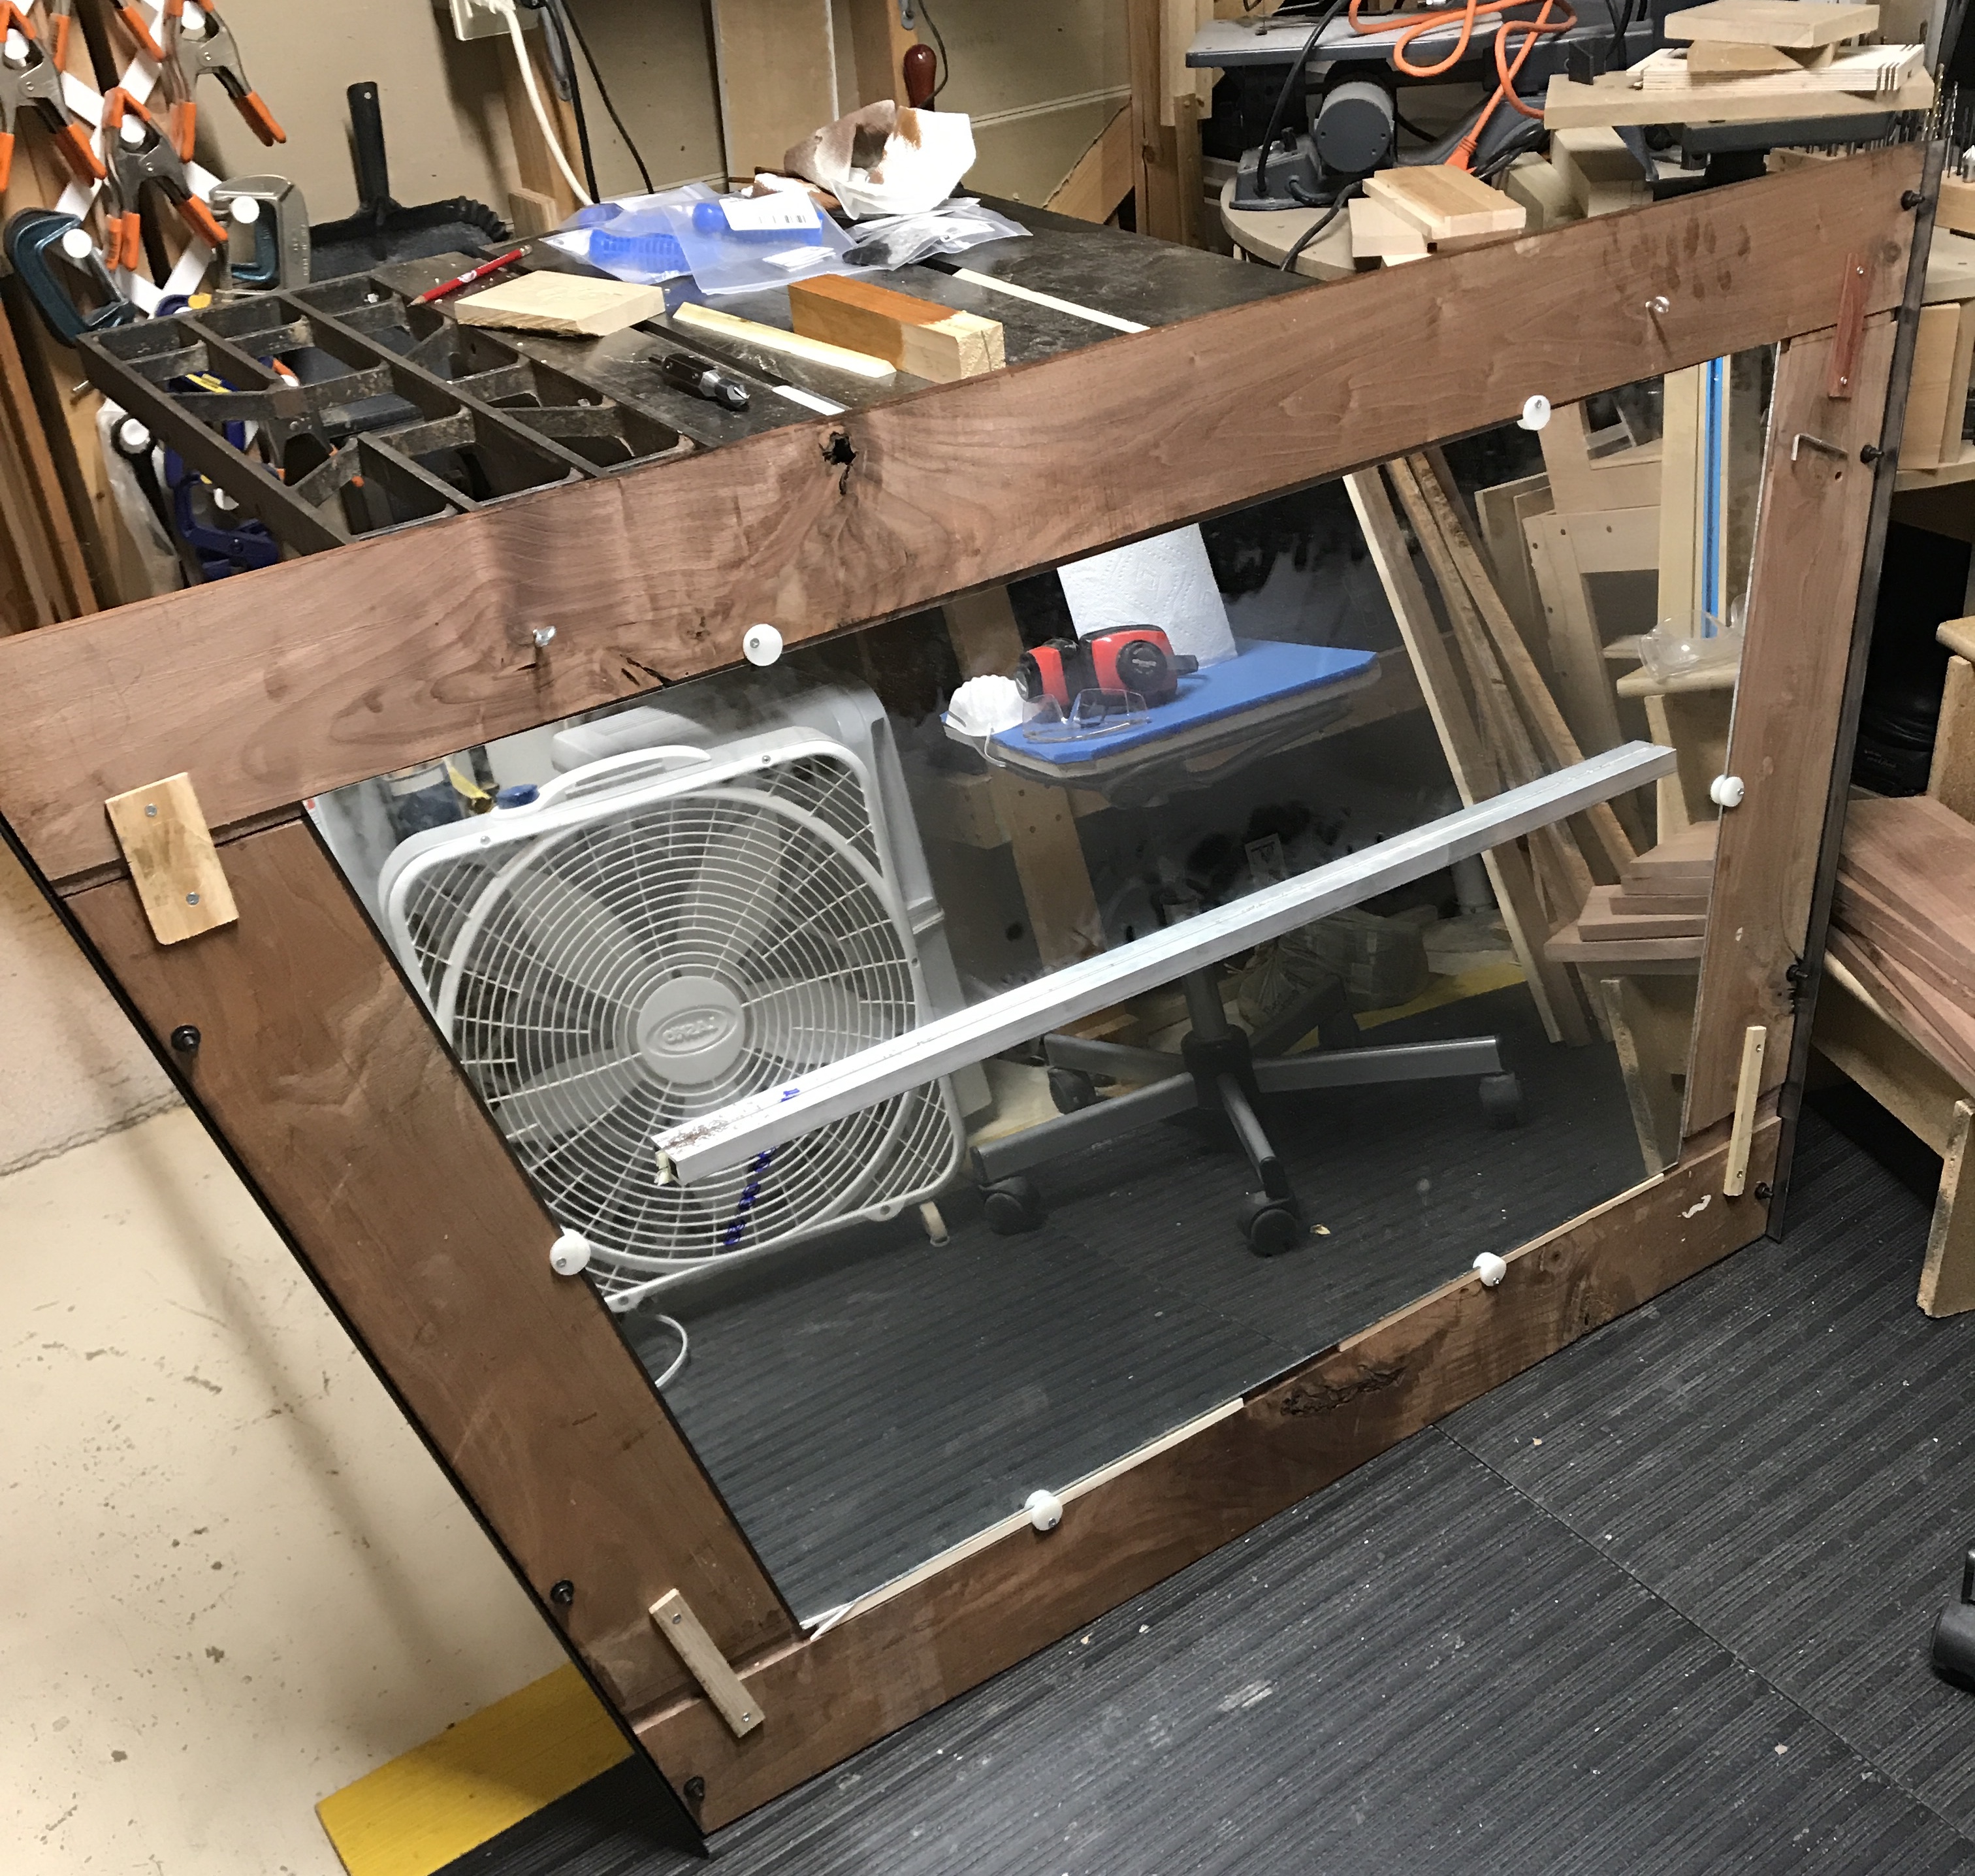
I couldn't stop myself and did two more things to the mirror frame. I reinforced each of the corners. A small length of wood was drilled for #6 through holes at each end and countersunk. The holes were marked on a side and on either the top or bottom. The holes were drilled about 1/4" deep by hand and the wood strips were screwed into place to further reinforce each of the corners. I also added two "eyes" on the top for the hanging wire. They are 12" in from the sides and 3" down from the top. And just to be complete, here is the back side of the mirror and frame.
Doug and Sue picked up the mirror today. They were quite pleased with the look. Doug handed me a bottle of Balvenie Double Wood, yumm! I was not expecting payment, but payment in scotch is always appreciated. He also told me the wood was walnut not hickory!!